1 VipsPM - Project Management Suite
VipsPM - Project Management Suite is a web-based project management suite. VipsPM is a perfect tool to fulfill all your project management needs. VipsPM is a modern tool built with latest technologies like Angular 8(Front-end), Laravel 11.*(Back-end), PHP & MySQL database. The Angular CLI makes it easy to maintain this application that already works, right out of the box. It includes 7 Transparent, 7 gradient, Dark Theme Layout, unlimited custom menu color options and 3 different sizes with organized folder structure, clean & commented code.
VipsPM comes with AOT and Lazy Loading. With AOT, the browser downloads a pre-compiled version of the application. The browser loads executable code so it can render the application immediately, without waiting to compile the app first. With Lazy Loading, it allows you to load JavaScript components asynchronously when a specific route is activated.
Developed By: ChetsApp Private Limited
Created: 17 Dec 2019
Updated: 11 July 2023
Contact: support@chetsapp.com
Thanks for purchasing this item.Please read carefully the complete documentation before starting.If you have any questions that are beyond the scope of this documentation, please feel free to contact us via email. Thanks a lot!
2 Installation
On some operating systems, the . (period) files are hidden by default.
Before starting to upload the files, Please make sure your file explorer has the option to view hidden files turned on.
After all software prerequisites is done, download the ZIP archive and take the VipsPM4.0.zip, then unzip it to your desired place.
- If you are using XAMPP, place your folder inside
htdocs/directory. - If you are using WAMP, place your folder inside
www/directory. - If you are using LIVE SERVER, place your folder inside
public_html/directory. - If you are using LINUX, place your folder inside
var/www/html/directory.
- In this zip file, we have provide 3 main folders:
InstallationSeparate_installationVipsPM_update4.0
Installationfolder has frontend and backend together which you can upload/deploy in shared hosting or live server and run your application for initial setup. It is very quick. you can deploy in single subdomain.Separate_installationfolder use for developing. This containsVipsPM_angular(For frontend) andVipsPM_laravel(For backend) subfolders for seperate installation on your developing environment.VipsPM_update4.0folder use for update your existing environment of VipsPM application.
2.1Single Installation
Step 1: Open your shared hosting cPanel.
Step 2: Click on file upload.
Step 3: Upload the VipsPM4.0/Installation folder content to the root directory of public_html or You can create your own folder/subfolder inside the public_html and upload VipsPM4/Installation folder's contents on that folder.
Step 4: If everything went well, open your domain URL.
- Main Domain Setup (https://yourdomain.com)
If you have uploadInstallationfolder topublic_html/, then your URL becomehttps://yourdomain.com/public
For Example.
Domain : https://chetsapp.de
Document Root : /public_html
- Sub Domain Setup (https://vipspm.yourdomain.com)
If you have created your own folder/subfolder inside thepublic_htmland uploadVipsPM4.0/Installationfolder's content inside it, then your URL becomehttps://vipspm.yourdomain.com/public
Note - It is compulsory to create new sub domain if you want to deploy project inside subfolder. Subdomain document root should be/public_html/folderand access URL should behttps://vipspm.yourdomain.com/public
For Example.
Subdomain : https://vipspm.chetsapp.de
Document Root : /public_html/vipspm
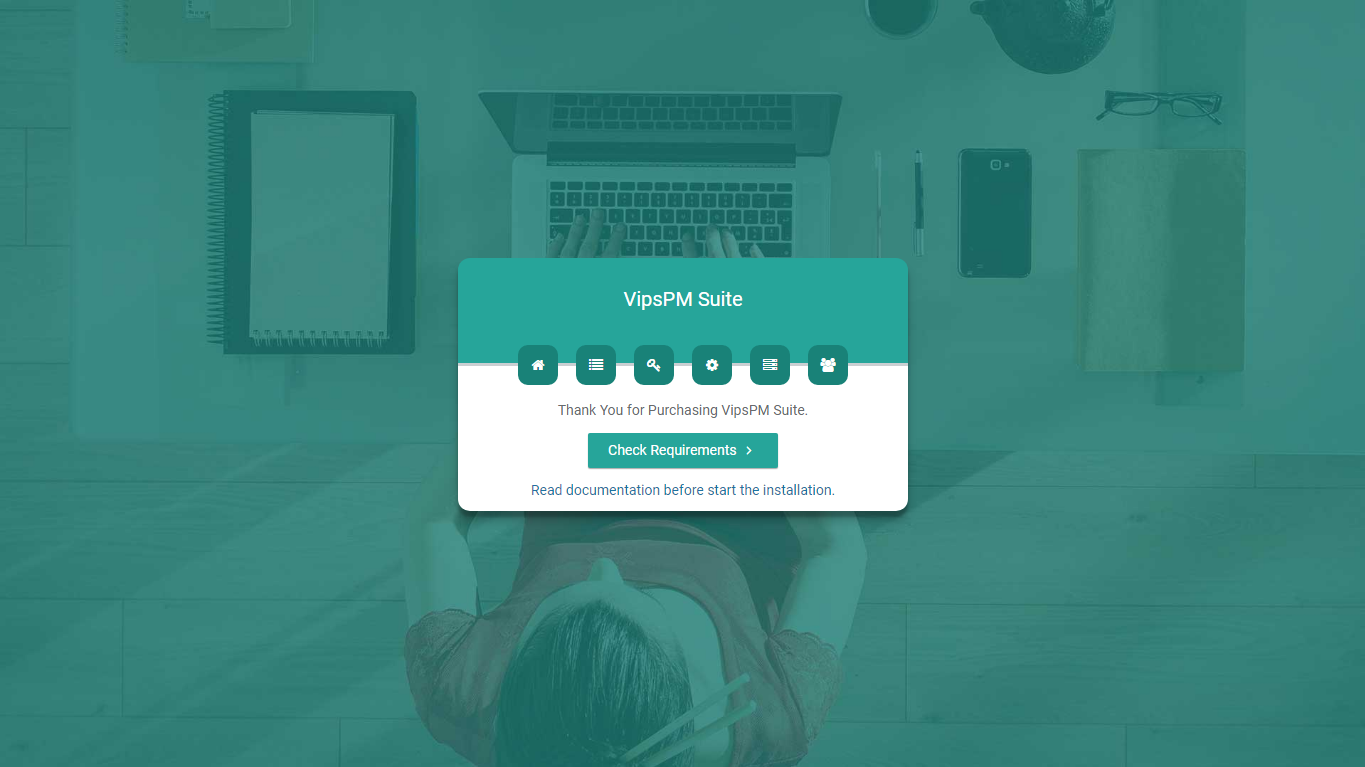
After this, You can see the screen like this. Next, click on Check Requirements button.
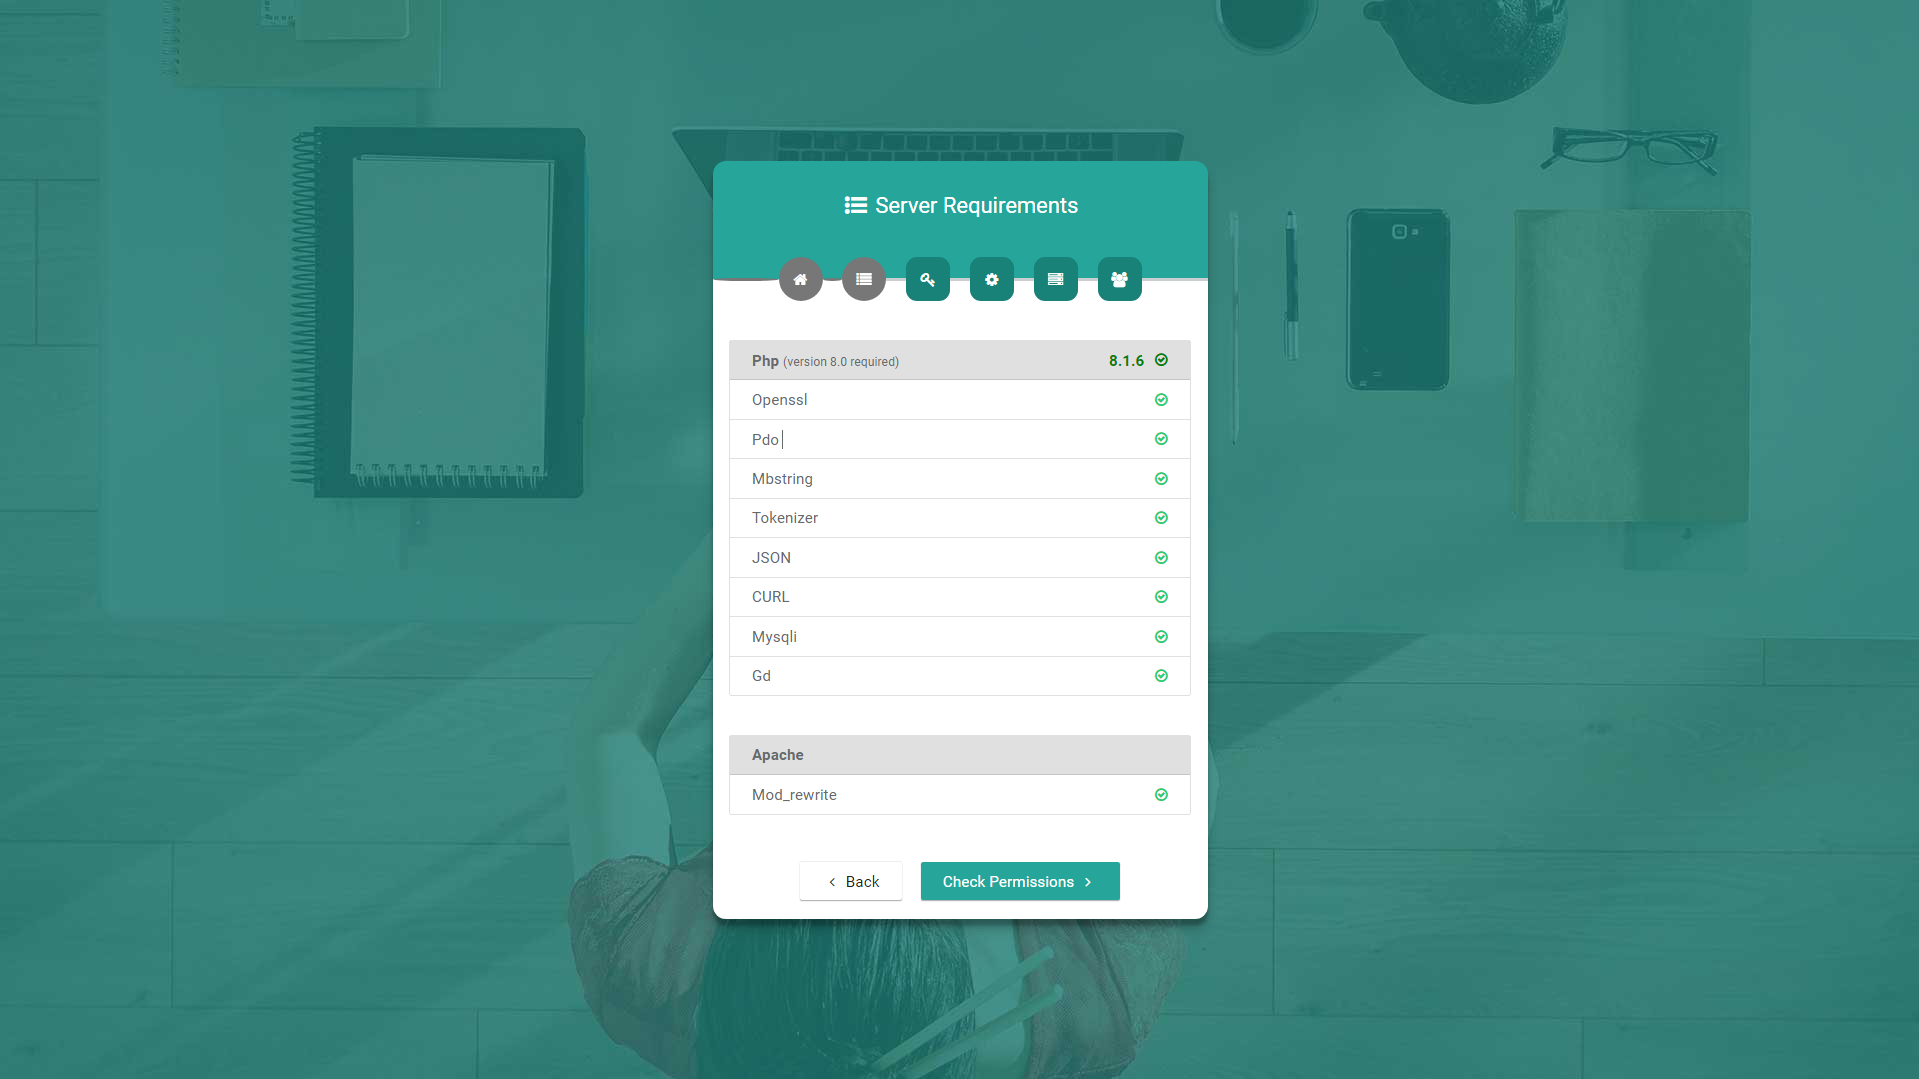
Step 5: Fullfill the server requirements by installing the required following php extensions, if not installed. Next, click on Check Permissions button.
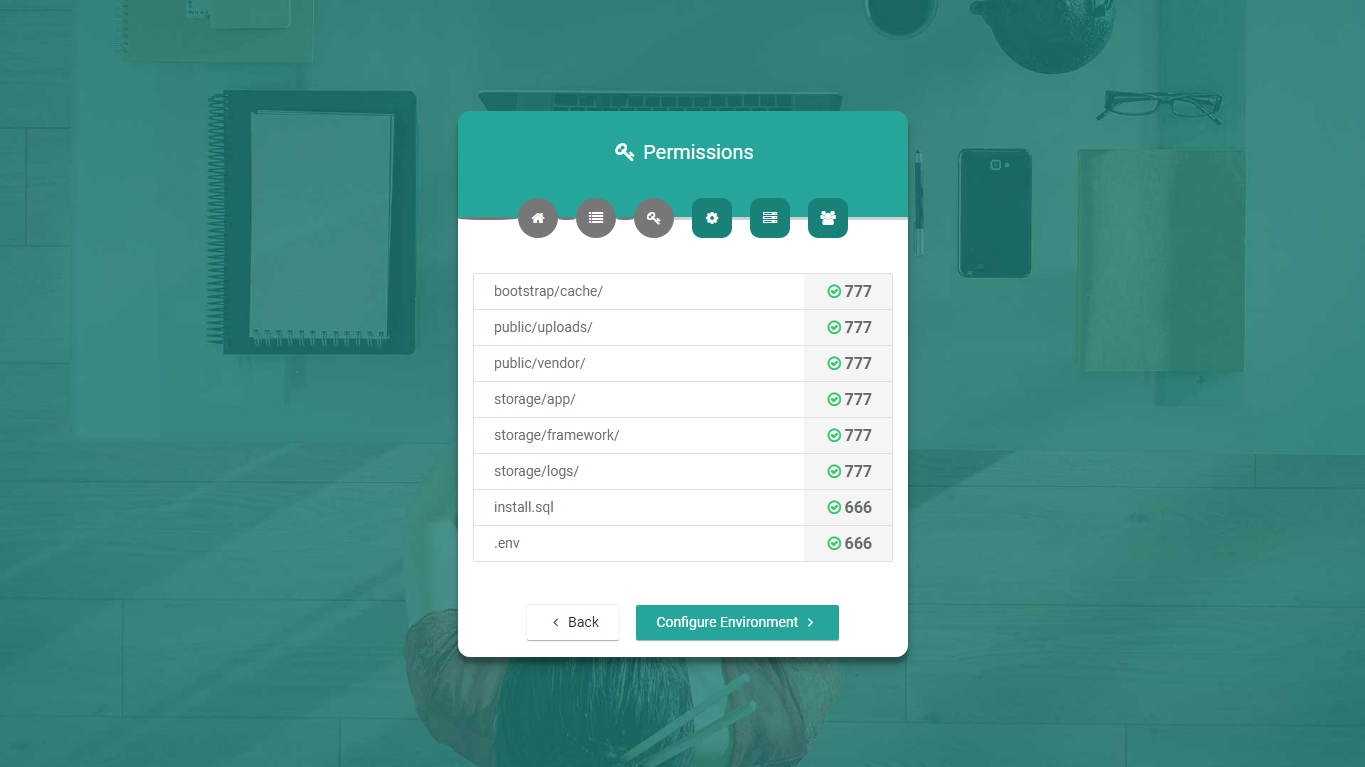
Step 6: Check and give required permissions to the folders/files. Next click on Configure Environment button.
If you have any issue regarding folders/files permissions, you can give manually permissions to that folders and files.
To get more help check laravel configuration documentation.
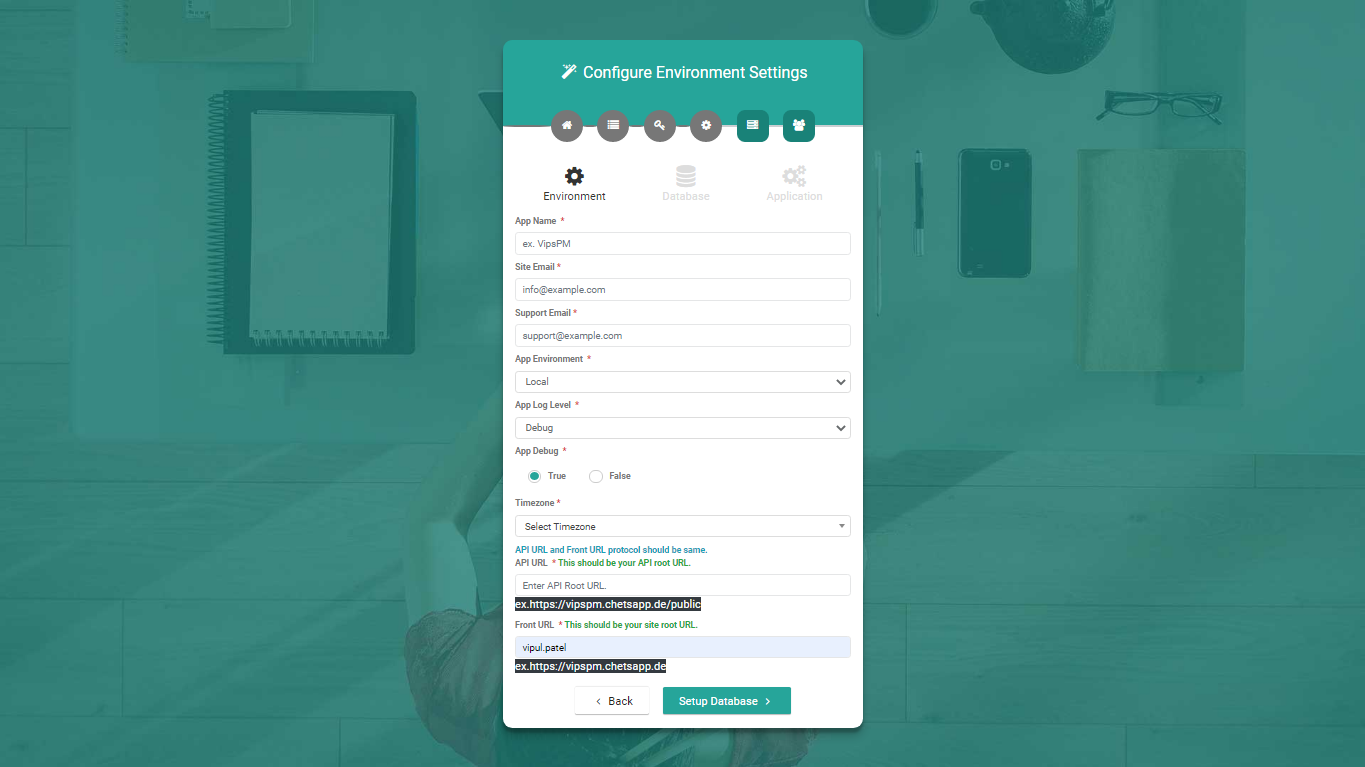
Step 7: Check and set your application environments configurations like application's name, email, timezone, application front and backend URL. This settings will be replace with .env file. Next click on Setup Database button.
- App Name: Your application name, whatever you want.
- Site Email: Your site email, whatever you want.
- Support Email: Site support email, whatever you want.
- Timezone: Select timezone related to your countries.
- App Environment: Select you're debugging mode like local, production, etc...
- App Log Level: Generate application log for debug, info, notic, warning etc...
- App Debug: Set your application in debug mode or not.
- API URL: Set your application root URL, You can copy your current window tab URL path till public folder, Do not enter forward slash (/) after public.
Examples:https://yourdomain.com/publichttps://yoursubdomain.com/public - Front URL: Set your frontend application URL. Remove public from the above API URL and it will become your frontend URL.
Examples:https://yourdomain.comhttps://yoursubdomain.com
Step 8: Create a database on your web host.
- Most cPanel comes with PHPMyAdmin and Mysql Database Wizard. Use the Mysql Database wizard to create a Database and User, then assign the user to the database allowing all privileges. Note down the username and password you'll need that soon.
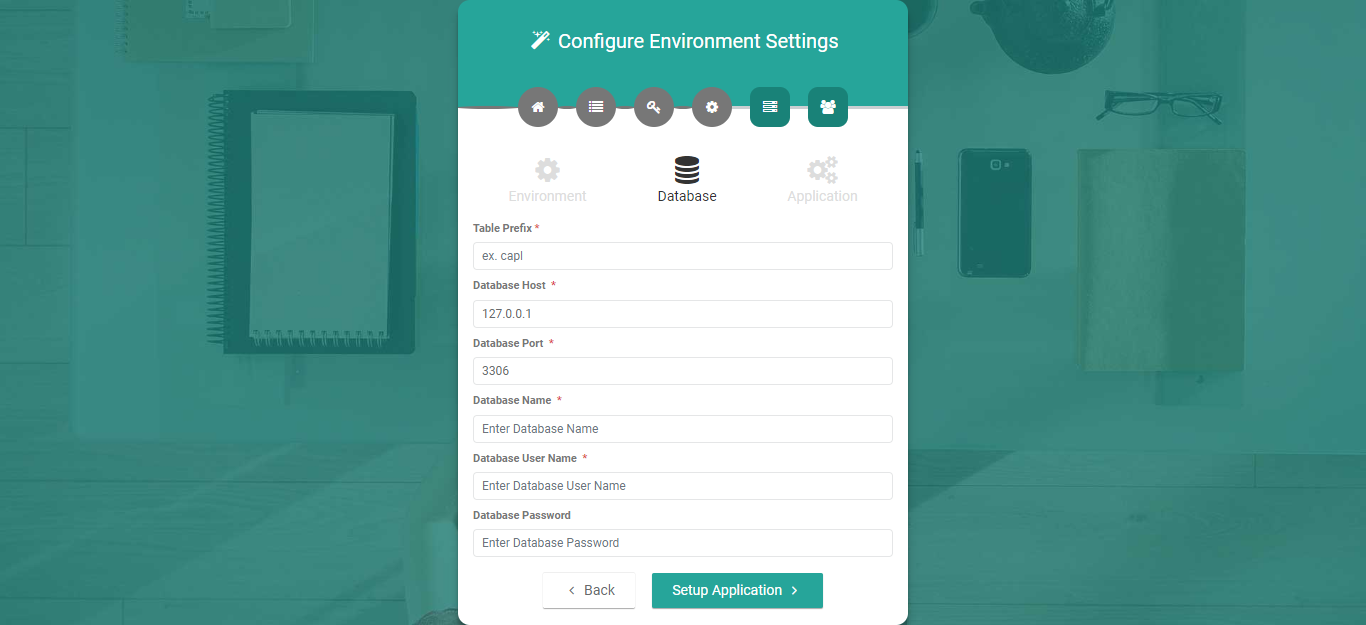
Step 9: Check and set your database environments configurations like database name, host, port, username and password. Next click on Setup Application Button.
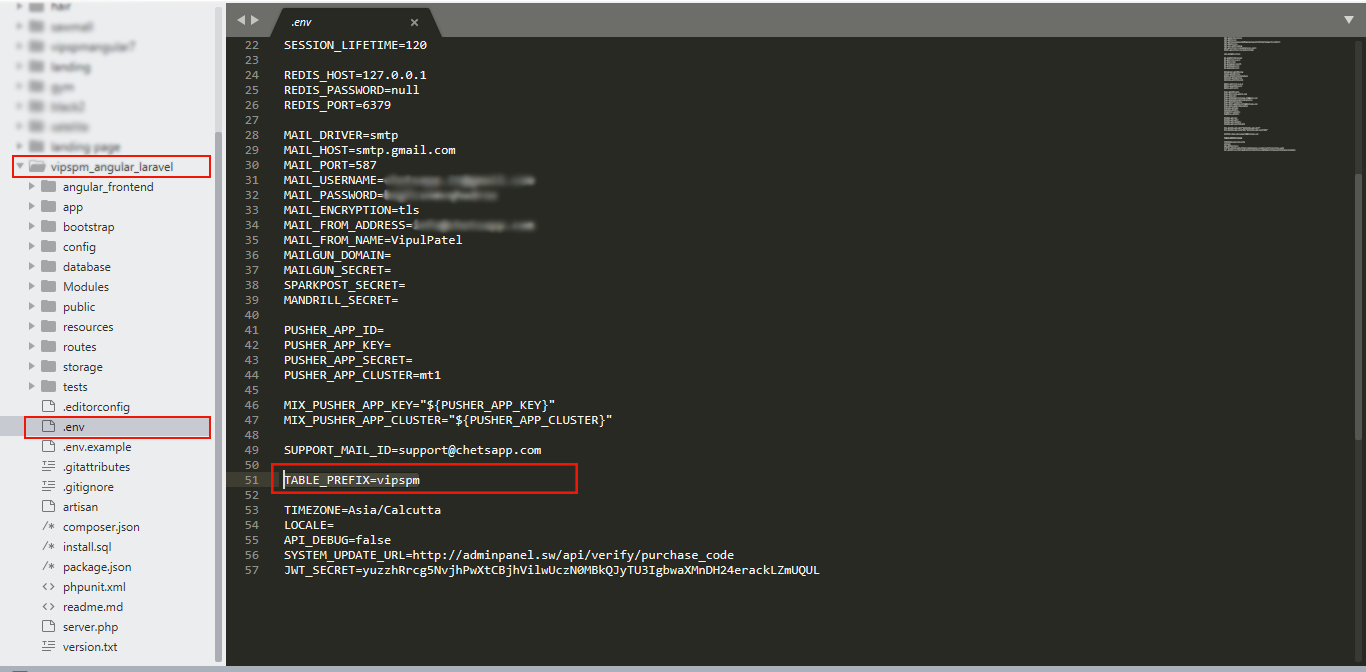
- Table Prefix: Choose prefix that includes only alphabets and underscore. Not include any special characters, spaces, etc. The maximum size should not be more then 10 characters.
-
Database Host: Your database host. For more info check you PHPMyAdmin configurations.
Examples:localhost, 127.0.0.1 -
Database Port: Your database port. For more info check you PHPMyAdmin configurations.
Example:3306 - Database Name: Your database name.
- Database Username: Your database username.
- Database password: Your database password. This field is optional depends on your PHPMyAdmin login credentials.
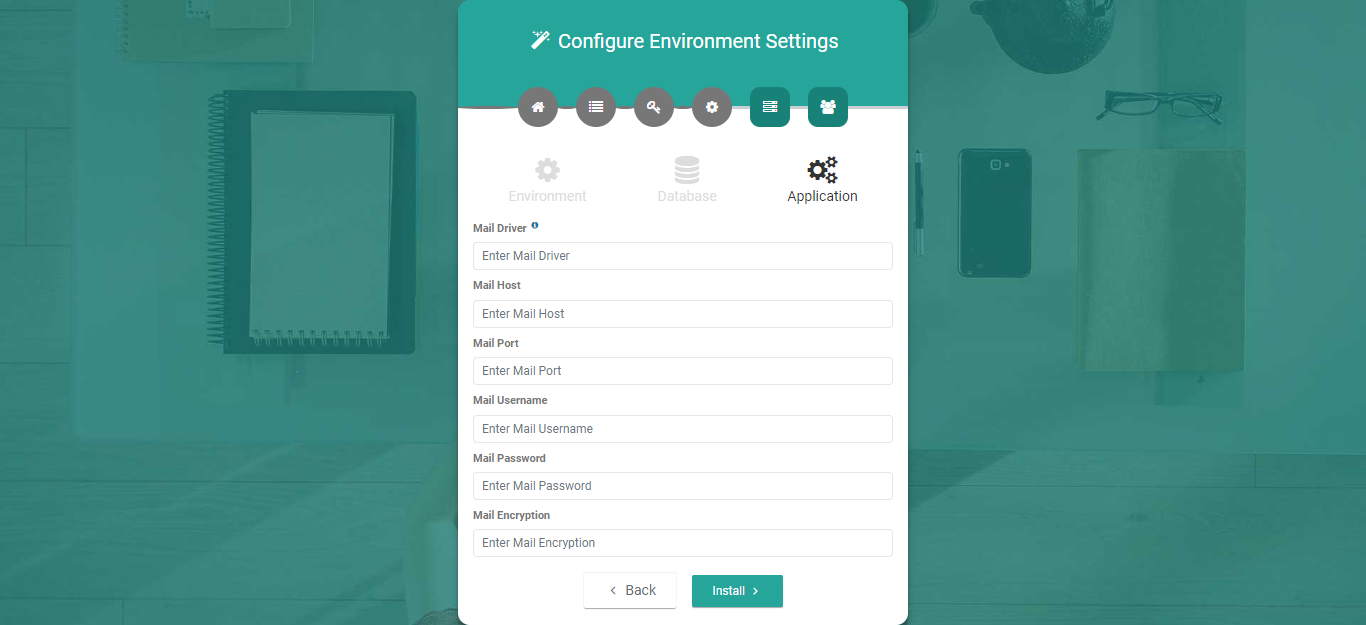
Step 10: Setup your SMTP mail configurations like host, port, username, password, etc. You can skip this step at the time of installation, but it is compulsory to configure email settings for email functionality. Next click on Install Button.
- Mail Driver: SMTP.
- Mail Host: Your SMTP mail server host.
- Mail Port: Outgoing mail port.
- Mail Username: Outgoing mail address.
- Mail Password: Outgoing mail password.
- Mail Encryption: It should be tls or ssl.
-
Example:
Mail Driver: smtp
Mail Host: smtp.gmail.com
Mail Port: 587
Mail Username: example@gmail.com
Mail Password: Example@123!
Mail Encryption: tlsNote: You can find your server email settings under cPanel Mail Client Manual Settings.
Start -> Email -> E-Mail Accounts -> Connect Device -> Mail Client Manual Settings
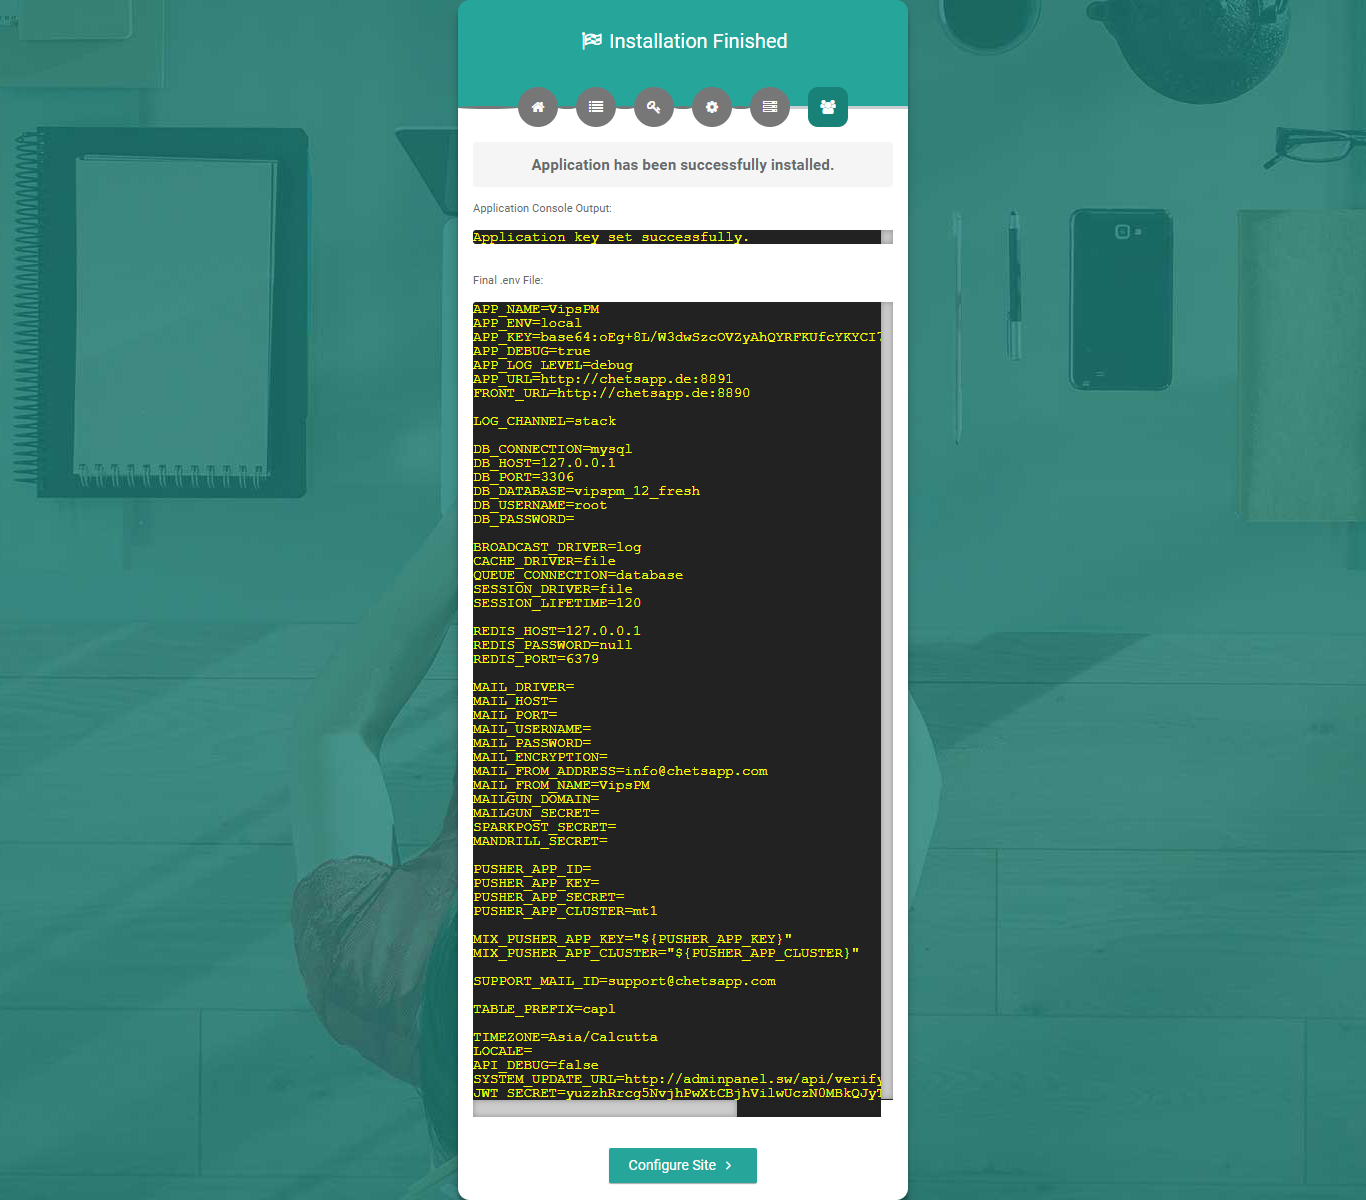
Step 11: After successfully installation you get the following screen, otherwise back to the previews steps. Next click to the Configure Site button.
Step 12: Configure your site admin user by adding username, first name, last name, currency, email, and password. Next click to the Save and Finish button.
The site user is a super admin of your site, that has full rights to access all functionalities of the whole site. He can create users, clients, projects, departments with roles and permissions etc...

Step 13: After successful installation you must have to create root/.htaccess file according to your server for restrict direct browser access of sensitive files. You can see sample code below.
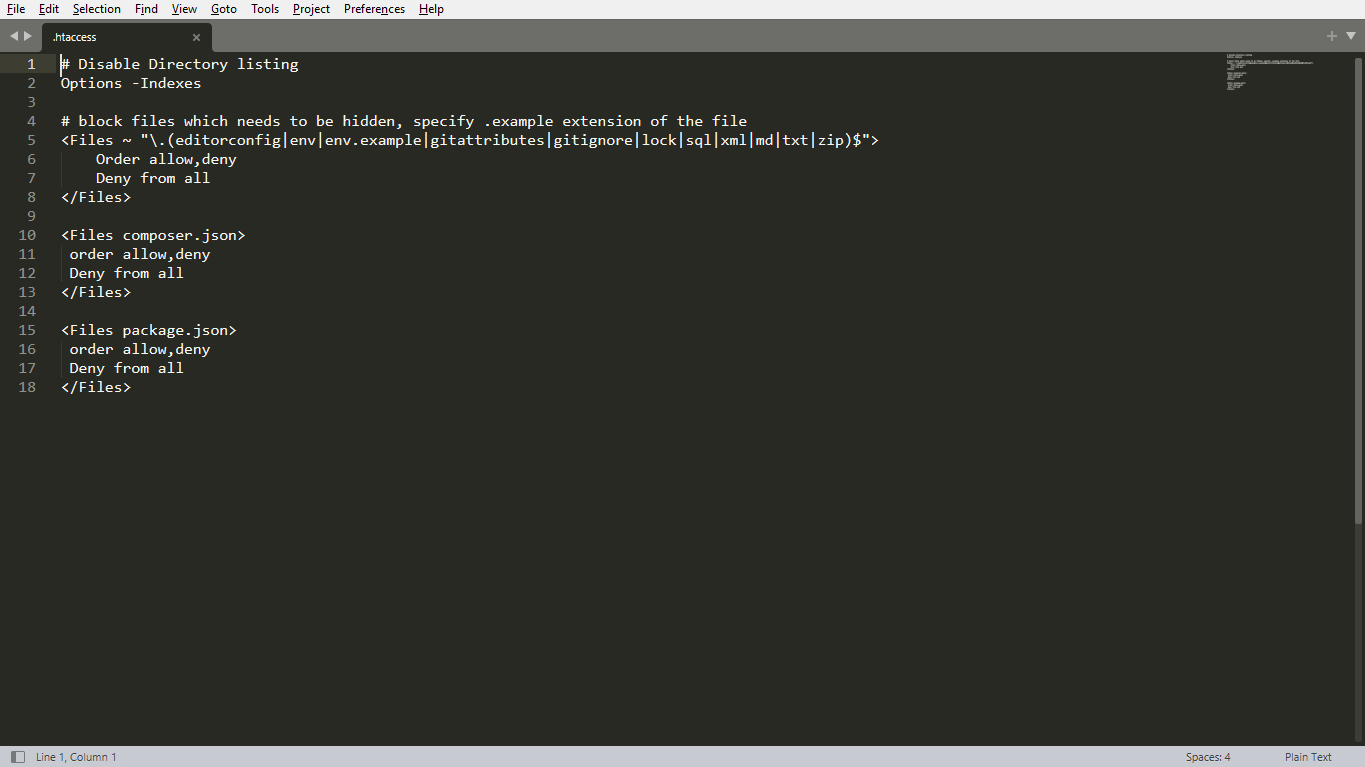
If you get any issue then read FAQ.
2.2Separate (Development)
2.2.1Installing VipsPM-angular (Frontend)
Following steps for setup angular application in your local or development environment.
Step 1: After unzip VipsPM4.0.zip file, go to VipsPM4.0/Separate_installation/VipsPM_angular folder.
- This is the root folder of Frontend Angular Application, where all the frontend angular source files are available. Also, you have to run an angular CLI command in this place.
Step 2: If you don't have node installed then Download and install it. (Node supported version is 16.15.1)
Step 3: If you don't have Angular CLI installed globally, run the following command npm install -g @angular/cli@8.3.24 to install it on your machine. If you have already, you may skip this step.
Step 4: Open the terminal, command prompt etc... , Go to the root folder of VipsPM_angular and Install all dependencies using npm install command.
Step 5: Follow the below steps for Frontend Angular Application installation after setup Backend Laravel Application.
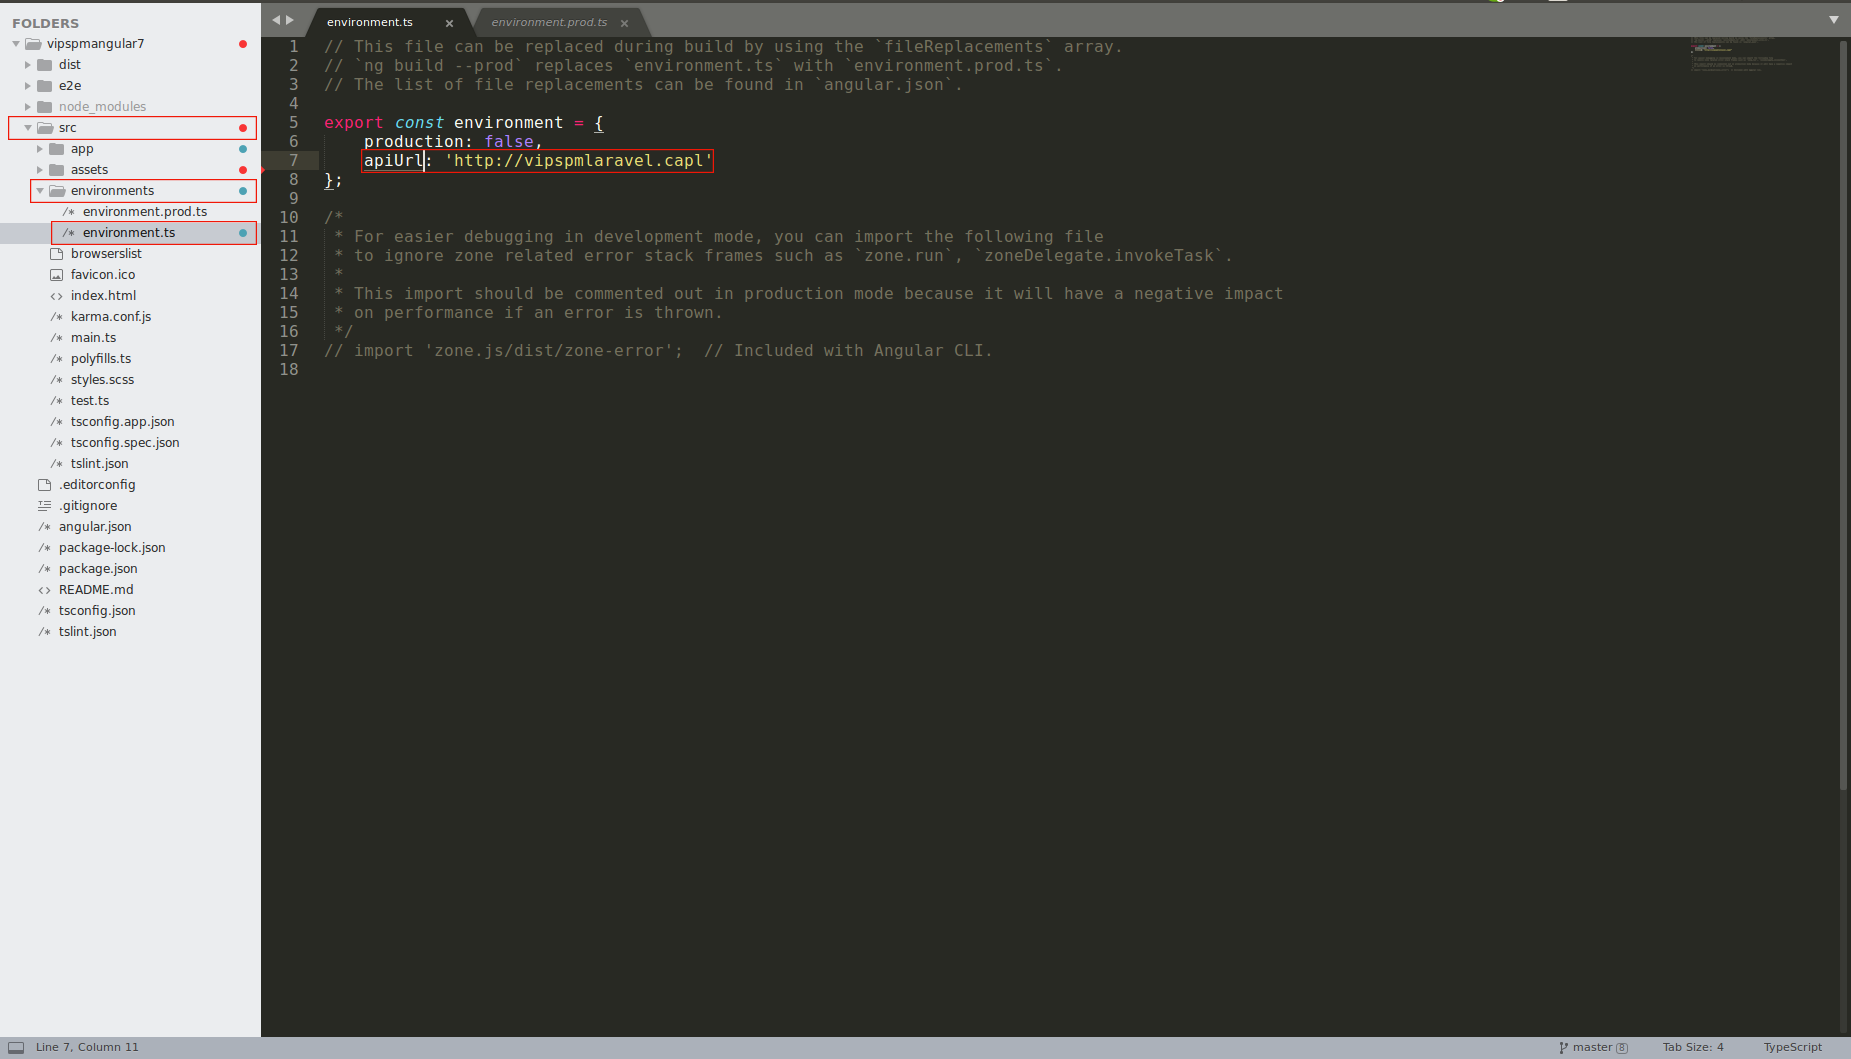
For development, Let's open up the src/environments/environment.ts file, change the apiUrl as URL of backend laravel application.
- If your laravel application inside
htdocs/VipsPM_laravelfolder then, your apiURL becomehttp://localhost/VipsPM_laravel/public - And another option is that start the laravel application server using
php artisan serveand sethttp://127.0.0.1:8000as apiUrl.
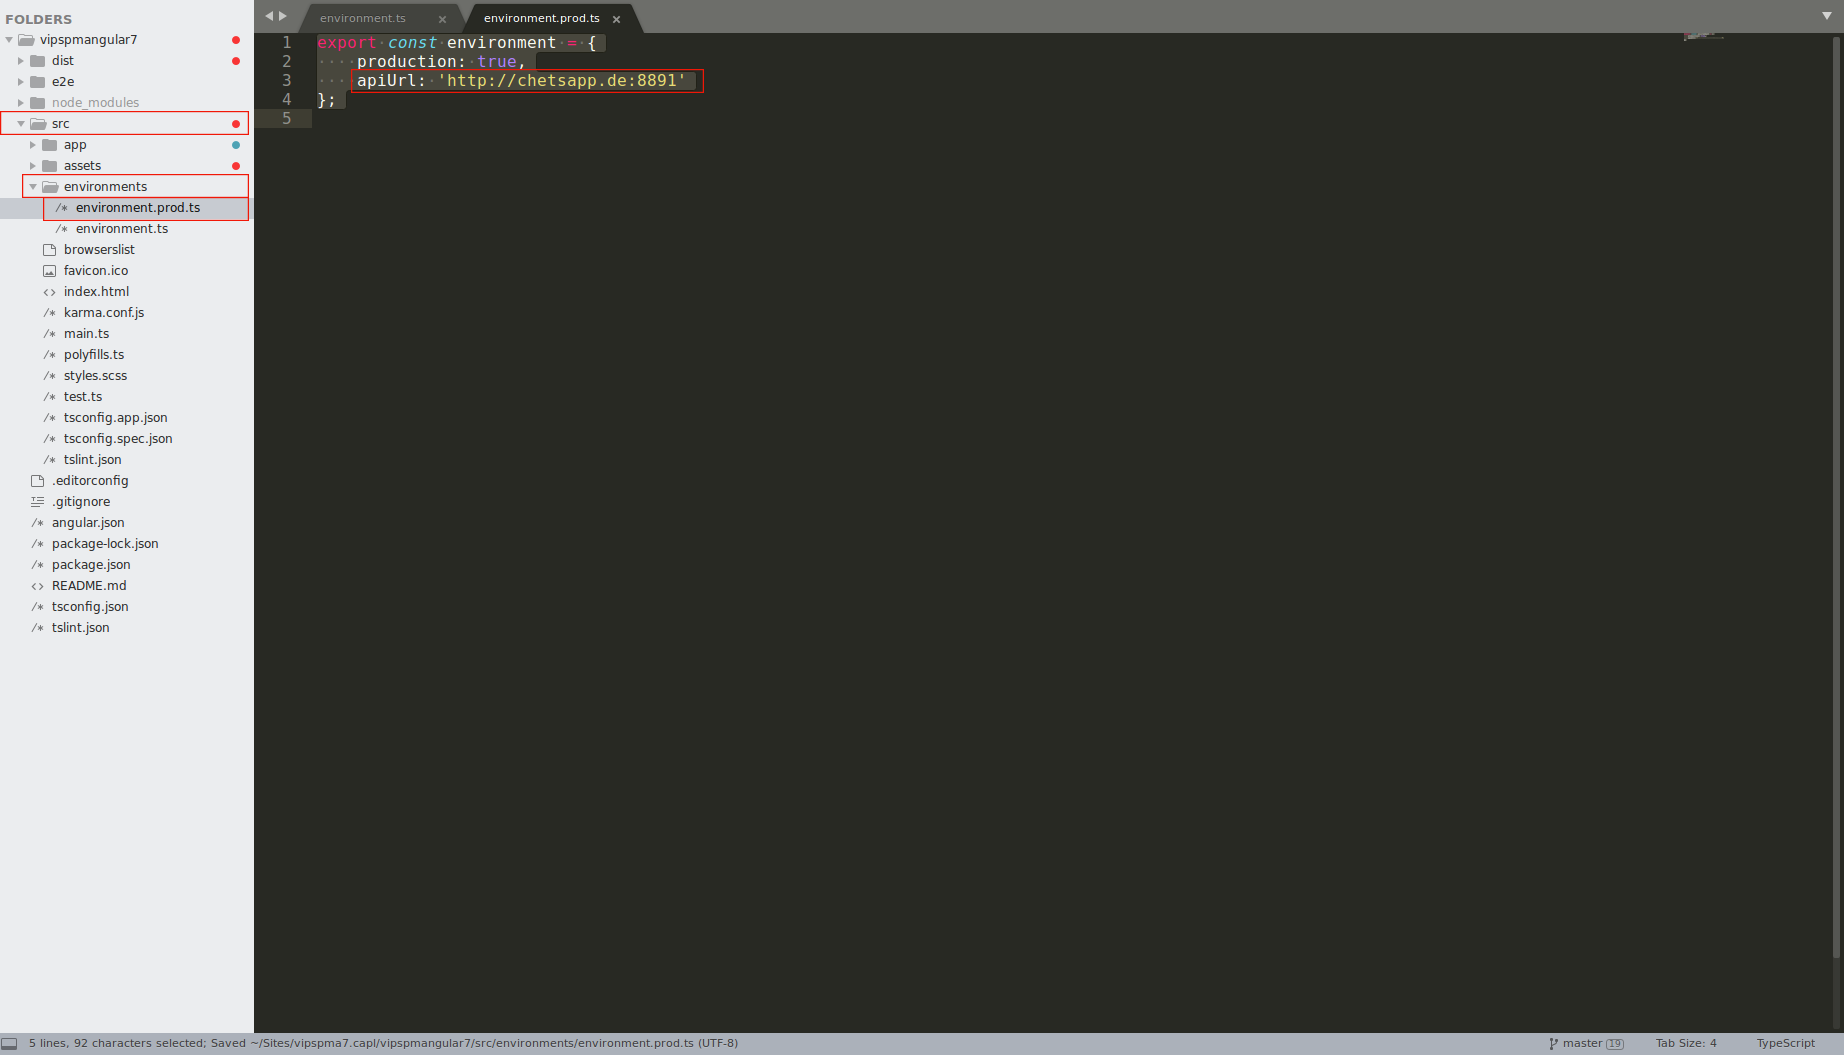
Step 6: For production, Let's open up the src/environments/environment.prod.ts file, change the apiUrl URL, where you have deployed the Laravel application on server. Ex. https://domain.com/public.
Running Angular Server
- Run
ng serve - Open the browser and Visit the url:
http://localhost:4200 - You can directly open the browse by using
--openflag withng serve. - For Exa.
ng serve --open
Build
- Run
ng buildto build the project. - The build artifacts will be stored in the
dist/directory. - For production use the
--prodflag. - For Exa.
ng build --prod
Angular Project Deployment on Live Server
- Deploy your Angular application to a remote server.
- Create a production build and copy the output directory to a web server.
- To get more help check angular project deployment guide.
Help
If your changes of source files not affected on web pages then run ng serve --poll=2000 command instead of ng serve.
To get more help on the Angular CLI use ng help or go check out the Angular CLI README
2.2.2Installing VipsPM-laravel (backend)
Following steps for setup laravel application in your local or development environment.
Step 1: After unzip VipsPM4.0.zip file, go to VipsPM4.0/Separate_installation/VipsPM_laravel folder. This is the root folder of the backend laravel application, where all the backend laravel source files are available.
Step 2: Open the terminal, command prompt etc... , Go to the root folder of VipsPM_laravel.
Step 3: Install all dependancy using composer install.
Step 4: Configure required folders/files and set required permissions to that folders and files. Additionally, you have to set required permission to public/uploads folder.
To get more help check laravel configuration documentation.
open URL http://localhost/VipsPM_laravel/public
After this, You can see the screen like this. Next, click on Check Requirements button.
Step 5: Fullfill the server requirements by installing the required following php extensions, if not installed. Next, click on Check Permissions button.
Step 6: Check and give required permissions to the folders/files. Next click on Configure Environment button.
If you have any issue regarding folders/files permissions, you can give manually permissions to that folders and files.
To get more help check laravel configuration documentation.

Step 7: Check and set your application environments configurations like application's name, email, timezone, application front and backend URL. This settings will be replace with .env file. Next click on Setup Database button.
- App Name: Your application name, whatever you want.
- Site Email: Your site email, whatever you want.
- Support Email: Site support email, whatever you want.
- Timezone: Select timezone related to your countries.
- App Environment: Select you're debugging mode like local, production, etc...
- App Log Level: Generate application log for debug, info, notic, warning etc...
- App Debug: Set your application in debug mode or not.
- API URL: Set your application root URL, You can copy your current window tab URL path till public folder, Do not enter forward slash (/) after public.
Examples:http://localhost/VipsPM_laravel/public - Front URL: Set your frontend application URL.
Examples:http://localhost:4200http://localhost:5000
Step 8: Create a database on your web host.
- Use the phpmyadmin to create a Database and User, then assign the user to the database allowing all privileges. Note down the username and password you'll need that soon.
Step 9: Check and set your database environments configurations like database name, host, port, username and password. Next click on Setup Application Button.
- Table Prefix: Choose prefix that includes only alphabets and underscore. Not include any special characters, spaces, etc. The maximum size should not be more then 10 characters.
-
Database Host: Your database host. For more info check you PHPMyAdmin configurations.
Examples:localhost, 127.0.0.1 -
Database Port: Your database port. For more info check you PHPMyAdmin configurations.
Example:3306 - Database Name: Your database name.
- Database Username: Your database username.
- Database password: Your database password. This field is optional depends on your PHPMyAdmin login credentials.
Step 10: Setup your SMTP mail configurations like host, port, username, password, etc. You can skip this step at the time of installation,but it is compulsory to configure email settings for email functionality. Next click on Install Button.
- Mail Driver: SMTP.
- Mail Host: Your SMTP mail server host.
- Mail Port: Outgoing mail port.
- Mail Username: Outgoing mail address.
- Mail Password: Outgoing mail password.
- Mail Encryption: It should be tls or ssl.
-
Example:
Mail Driver: smtp
Mail Host: smtp.gmail.com
Mail Port: 587
Mail Username: example@gmail.com
Mail Password: Example@123!
Mail Encryption: tlsNote: You can use your email account settings here...
Step 11: After successfully installation you get the following screen, otherwise back to the previews steps. Next click to the Configure Site button.
Step 12: Configure your site admin user by adding username, first name, last name, currency, email, and password. Next click to the Save and Finish button.
The site user is a super admin of your site, that has full rights to access all functionalities of the whole site. He can create users, clients, projects, departments with roles and permissions etc...
Important Notes
If any issue after installation then run the following commands:
php artisan optimize
Whenever you make changes in .env file, you must have to run following command for generating laravel caching.
php artisan config:cache
3 Troubleshooting
3.3.1Prerequisites
- Node and NPM (Node Supported version
16.15.1) - Angular CLI (Angular CLI Supported version
8.3.24)
For more info check angular documentation.
Set up the Development Angular CLI
- The Angular CLI is a command-line interface tool that can create a project. This guide is to build and run a simple angular application in TypeScript, using the Angular CLI while adhering to the Style Guide
- You need to set up your development environment before you can do anything. Install Node.js and npm if they are not already on your machine.
Server Requirements
- PHP >= 8.2
- Ctype PHP Extension
- cURL PHP Extension
- DOM PHP Extension
- Fileinfo PHP Extension
- Filter PHP Extension
- Hash PHP Extension
- Mbstring PHP Extension
- OpenSSL PHP Extension
- PCRE PHP Extension
- PDO PHP Extension
- Session PHP Extension
- Tokenizer PHP Extension
- XML PHP Extension
- PHP Zip extension
- JSON PHP Extension
- mod_rewrite Apache
- Cron (Running Per Minute)
- Composer
Install Composer (Globally)
To get more help check composer documentation.
Now all software prerequisites is done. After downloading the ZIP archive take the VipsPM4.0.zip, then unzip it to your desired place.
- If you are using XAMPP, place your folder inside
htdocs/directory. - If you are using WAMP, place your folder inside
www/directory. - If you are using LIVE SERVER, place your folder inside
public_html/directory. - If you are using LINUX, place your folder inside
var/www/html/directory.
3.3.2Manually Change Configurations for VipsPM-laravel (backend)
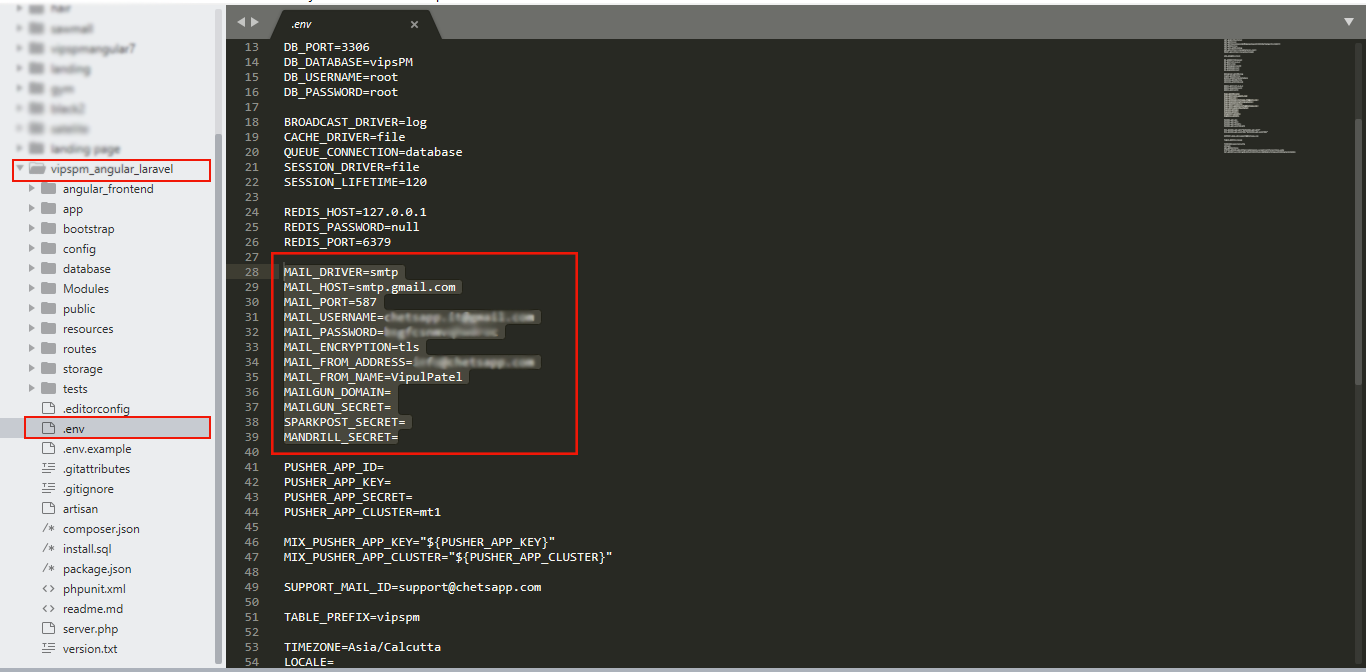
Change your laravel application mail configurations.
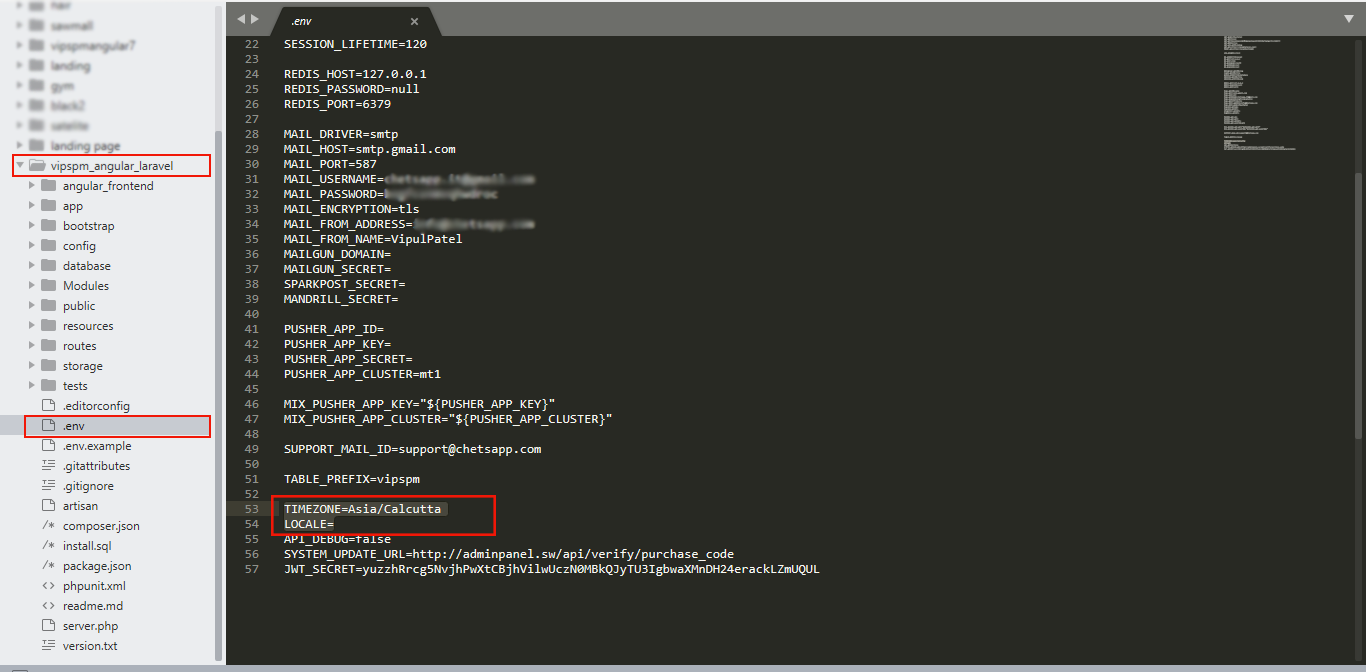
Change your laravel application timezone and locale.
Change your database table prefix(Optional)
- Choose prefix that includes only alphabets and underscore. Not include any special characters, spaces, etc. The maximum size should not more then 10 characters.
- The main use of the table prefix is that you can centralize your database on a specific server. Single database with unique tables.
- Ex. vipspm, capl, pms etc.
- All the laravel artisan command must be run on project root folder.
- If there are any changes related to laravel environment configurations, then you must have to run
php artisan config:cache - Laravel application start from the public folder, so you must have to set
APP_URLaccording that. - Here, We have use laravel backend work as
Rest API.
3.3.3FaQ
- Check the
.envfile exists on the project root folder. If not then upload from zip. - Check the PHP version, We use Laravel 11.* and it's not support PHP 7.*, If your PHP version is 7.* then upgrade it to PHP 8.2.
- First of check with clear browser cache and hard reload.
- Open
root/public/vendor/main.470b8fc2b14b27f34622.jsfile. Just findhttp://dev.vipspm.chetsapp.deURL. ifhttp://dev.vipspm.chetsapp.deURL is there then replace it with your API URL. - The API URL should be
https://yourdomain.com/publicorhttps://yoursubdomain.com/public
Domain URL and API url protocol should be same. - Then empty the browser cache and hard reload it.
- Open your URL and move at
Settings->Themeand upload sidebar logo.
Find and open index.html file and change favicon icon.
For Single Installation:
- Upload favicon icon
root(Installation)\assets\img\logos\ - Update name
root(Installation)\index.html
For Separate Installation :
- Upload favicon icon
root(Separate_installation\VipsPM_angular)\src\assets\img\logos\ - Update name
root(Separate_installation\VipsPM_angular)\src\index.html
- Active cron from cron job settings.
https://yourdomain.com//#/settings -
Read cronjob settings
Examples:
* * * * * cd /path-to-your-project && php artisan schedule:run >> /dev/null 2>&1
* * * * * cd /var/www/vipspm && /usr/bin/php artisan schedule:run >> /dev/null
Installation\assets\i18n\
- Open the file. project_root(pm)\public\vendor\main.470b8fc2b14b27f34622.js
- Find http://dev.vipspm.chetsapp.de and replace it with your API URL
- Open .env file located at project_root(pm)\.env
- Set APP_URL=
https://domain.com/public - Set FRONT_URL=
https://domain.com - Run this URL for config cache ::
https://domain.com/public/config-cache
- Open
https://domain.com/#/settings - Select Company Details tab.
- Update Company Website.
- Clear browser cache and hard reload page.
4 Updation
New customers do not need to update the system, it is already updated.
Before updating, Please make a backup of your existing files/database! Some updates will overwrite/delete old data that may be useful to you!
For VipsPM 4.0 you have to set PHP version >= 8.2
After downloading the ZIP archive, take the VipsPM4.0.zip, then unzip it to your desired place.
- In this zip file, we have provide 2 main folders inside
VipsPM_update4.0folder:InstallationSeparate_installation
Installationfolder is use for share hosting or live server. You can upload and update your application on share hosting(cPanel) or in live server.Separate_installationfolder is use for developing. This containsVipsPM_angular(For frontend) andVipsPM_laravel(For backend) subfolders for seperate updation on your developing environment.
After update, please login as admin and provide permission to view new modules like Sales and HRM. to give permission goto admin-> department -> roles -> permission tick modules for view, edit, delete, etc.
4.1Production (Live server or Shared hosting)
If you want to update latest changes to your existing VipsPM application on your share hosting or live server, follow the following steps:
Step 1: Open your shared hosting cPanel.
Step 2: Go to your project root folder.
Step 3: Remove assets, vendor and public/vendor folder.
Step 4: Upload content of VipsPM_update4.0/Installation to your existing share hosting or live VipsPM application.
Step 5: Open public/vendor/main.470b8fc2b14b27f34622.js file and Find string http://dev.vipspm.chetsapp.de ,replace it with your existing created backend laravel API URL.
Domain URL and API URL protocol should be same.
API URL Example:
https://yourdomain.com/publichttps://yoursubdomain.com/public
Step 6: Open terminal and run below commands.composer dump-autoloadphp artisan optimize
Step 6: Run this URL for update database, Don't forget to take database backup before run this URL.https://yourdomain.com/public/updater/updatedb or https://yoursubdomain.com/public/updater/updatedb
Step 7: Open your domain URL Then empty the browser cache and hard reload it.
Step 8: Set new modules department vise permissions according to your requirements. https://yourdomain.com/#/departments
Note:
- If system return 500 then restart the server.
4.2Development (Local server)
If you want to update latest changes to your existing VipsPM application on your development(Local) environment, follow the following steps:
For laravel:
- Find and replace content of
VipsPM4.0/VipsPM_update4.0/Separate_installation/VipsPM_laravelto your existing VipsPM laravel application. - Run this URL for update databse.
http://localhost/VipsPM_laravel/public/updater/updatedb - If any issue related to updation, run the following command on root of your laravel application.
composer installphp artisan optimize
For angular:
- Find and replace content of
VipsPM4.0/VipsPM_update4.0/Separate_installation/VipsPM_angularto your existing VipsPM angular application. - If any issue related to updation, run the following command on root of your angular application.
npm installnpm cache clean --force5 VipsPM Key Features
- ngx-bootstrap
- Lazy loading
- Nested Routing
- Unlimited custom fields for projects, tasks, defects and incidents
- An Efficient Dashboard
- Sidebar backgound color with custom colorpicker
- Inline Editing
- File Browser for Media Library
- Mailbox
- Dark Theme
- Kanban Board
- Modern menu
- 7 gradient and 7 Transparent menu colors
- Menu with background image
- Angular Full Calendar
- Angular Data Tables
- Integrated 3 Icon sets
- Solid + Gradient + Dark Color Schemes
- Useful helper classes
- Organized Folder Structure
- SASS Support
- Cross Browser Compatibility
- Mobile compatible.
- Creative Layout
- Clean and Professional Code
- Easy to Customize
- Reports: Projects, tasks, defects, incidents
- & much more...
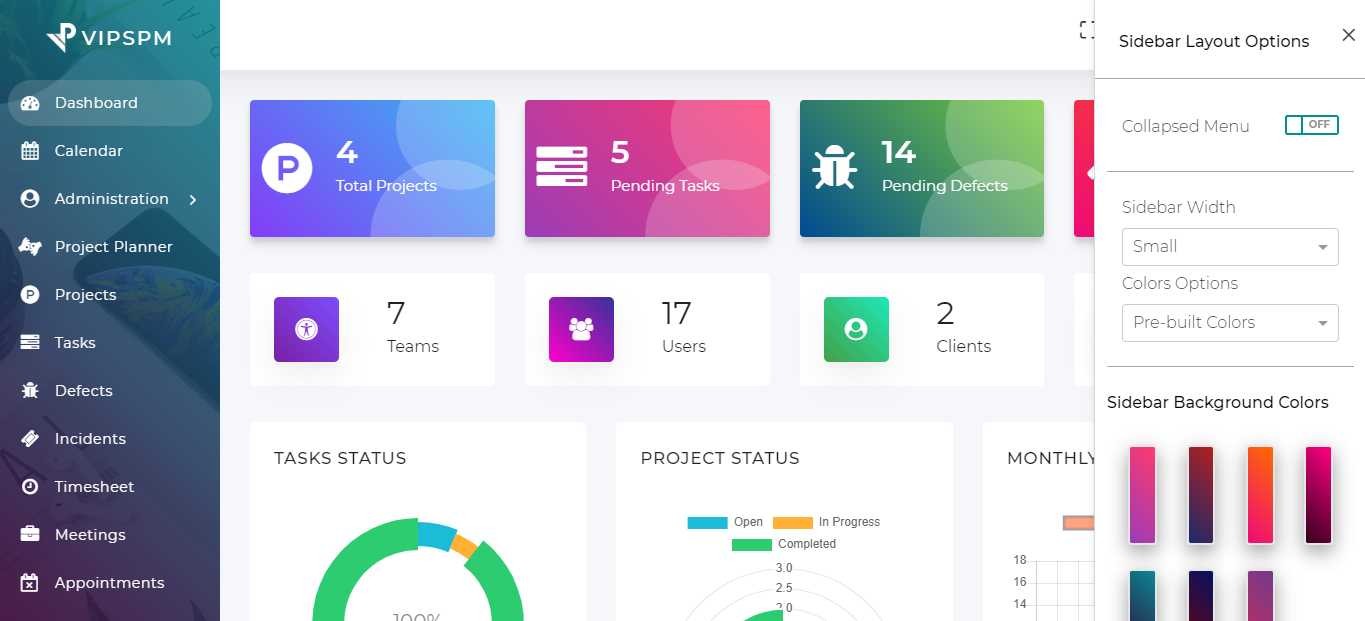
6 Theme Options
- Enable/Disable Callapse Menu
- Sidebar Width - Small, Medium or Large
- Layout Options
PreBuilt Layout - 7 Gradient Sidebar, 7 Transparent Sidebar, Backgroud Images.
Dark Layout - for Dark Theme.
Custom Layout - Transparent Sidebar, Sidebar Font Colors white or black
7 How to Use
VipsPM is easy to use among all the users. Please note the below steps for How to use VipsPM.
After login into the VipsPM tool with your credentials, you can see the dashboard appear on screen.
Initial registred user has full admin rights to manage VipsPM also from this release we have included 6 roles which can be managable from Admin -> Roles
- Admin - can have full access
- Staff - has limited access to selected modules
- Client - has limited access to selected modules.
- Project Manager - has limited access to selected modules.
- HR Manager - has limited access to selected modules.
- Sales Manager - has limited access to selected modules.
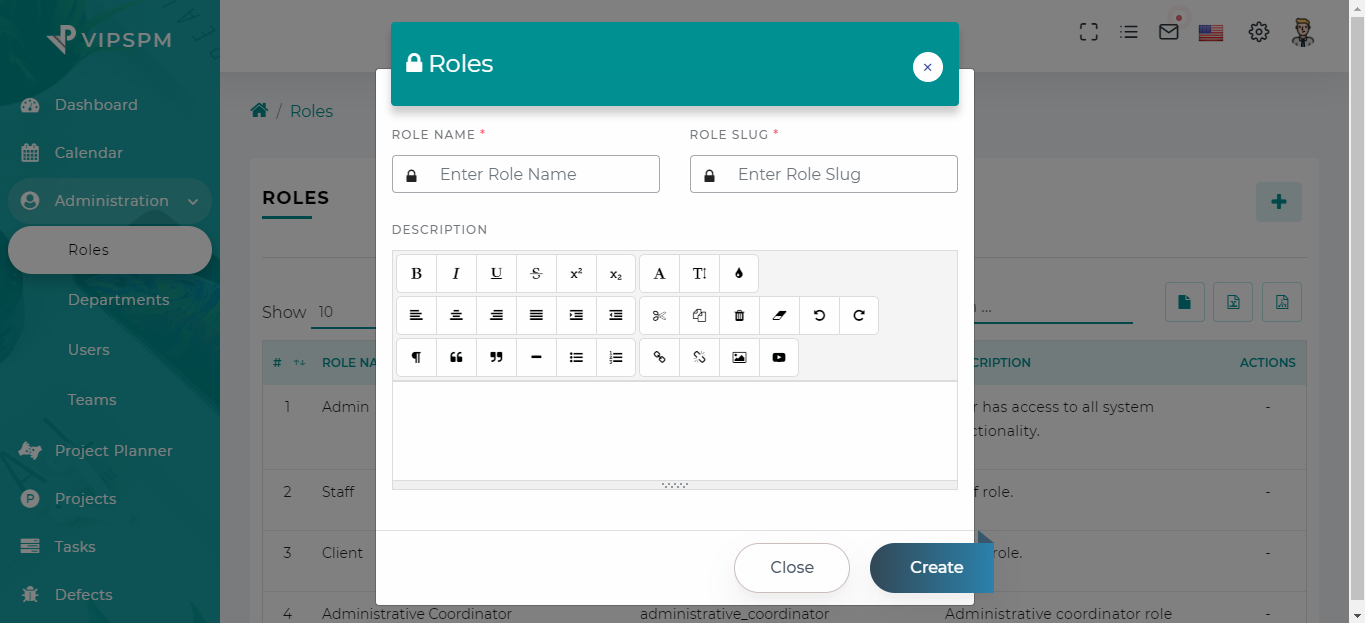
- 1. Manage roles by clicking roles menu from the left sidebar. Now you can see that roles lising page apear on screen. Create/edit role by click on buttons.
- 2. Manage departments by clicking departments menu from left sidebar. Now you can see that departments lising page apear on screen. Manage departments and assign particular roles to that departments.You can change permissions(Create, Edit, Delete) of pages, modules etc, on departments detail page.
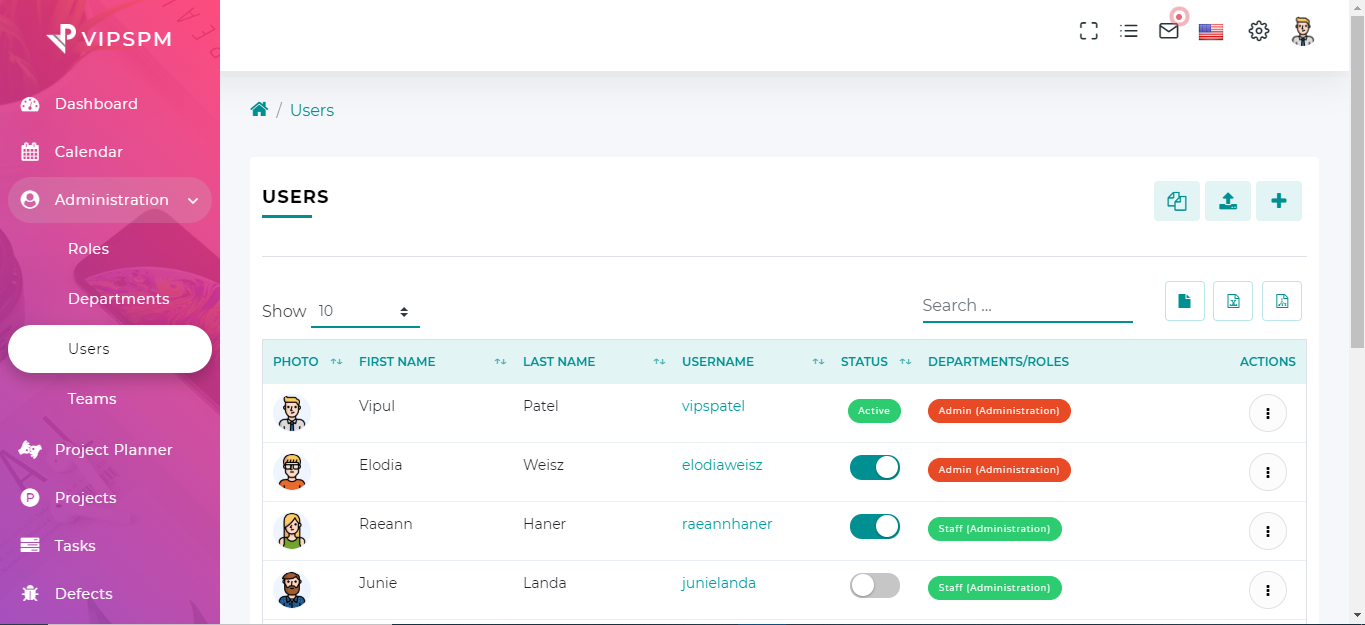
- 3. Create users by clicking users menu from left sidebar. Now you can see that users lising page apear on screen. Create users with fillup neccessary fields and also assign permissions to that users using departments, roles(Like admin, staff etc).
- 4. Create clients by clicking clients menu from left sidebar. Now you can see that clients lising page apear on screen. Create clients with fillup neccessary fields and also assign permissions to that clients using departments, roles(Like client role etc).
- 5. Create teams by clicking teams menu from left sidebar. Create team with fillup neccessary fields and assign team members to it also choose team leader from selected team members.
- 6. Create project with fillup neccessary fields like project name etc. You can also assign that project to team members from specific selcted team group.
- 7. Create defect with fillup neccessary fields like defect name etc. You can assign defect to team members of selected project.
- 8. Create incident with fillup neccessary fields like defect name etc. You can assign defect to team members of selected project.
You can know more about roles, departments, users, projects and modules detail on below section.
8 Module Pages
Dashboard
- Dashboard setting for enable and disable Widgets, Table, etc.
- Status of In Progress and Overdue projects, In Progress and Overdue tasks, In Progress and Overdue defects, In Progress and Overdue incidents, Accepted and Declined Estimates, Paid and Unpaid Invoices, Due and Received Payments, Received and Approved Leaves
- Count of teams, users, clients, and articles.
- Project's task progress show on donut chart, Project's status show on radar chart and monthly report show in bar chart.
- Recently created projects list, tasks list, defects list, incident list, todos list, meetings list, announcements list, user activities etc.
- Customize your sidebar colors and background images using theme color options by clicking on the top right setting icons.
- Mail notifications, languages translation, sidebar layout settings and other menu show in header.
- All menus show in left sidebar.
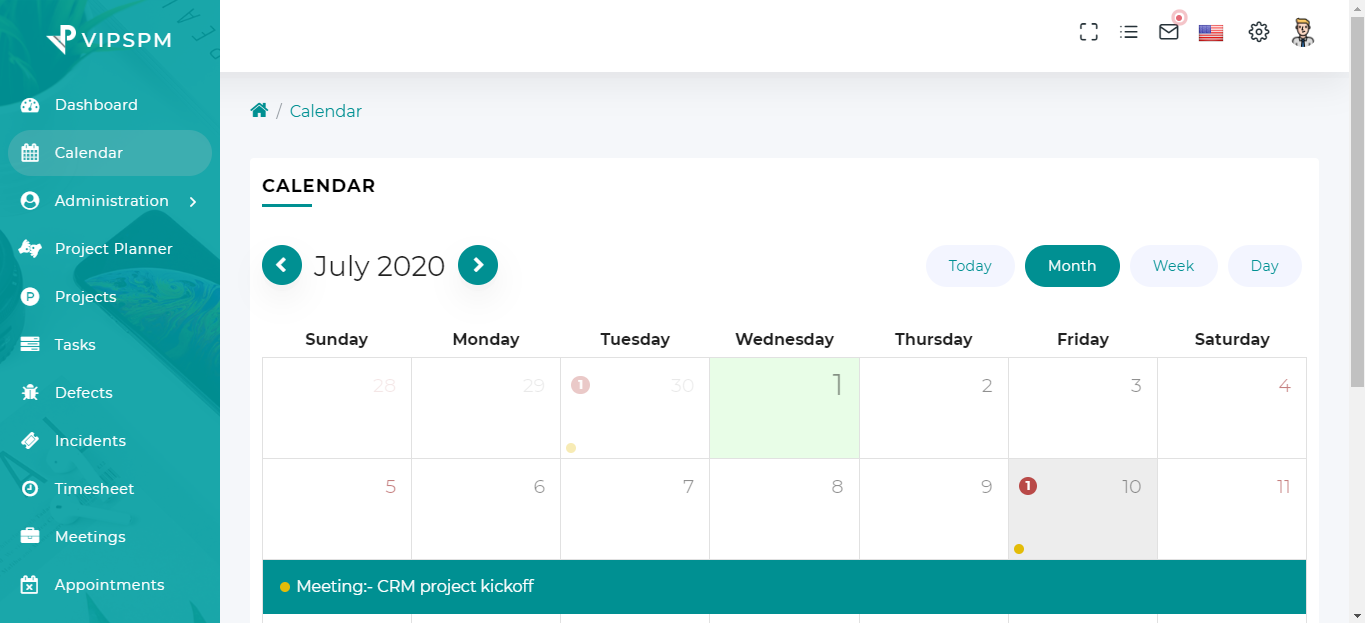
Calendar
- Tasks, defects, incidents, meetings, holidays and meetings show in calendar.
Roles
- Create/Edit/Delete multiples roles
- Manage Roles with flexible permissions of view, create, edit, delete rights of each modules
- Export csv, excel and pdf files
- Default 6 Roles are included for admin, staff, client, Project Manager, HR Manager and Sales Manager
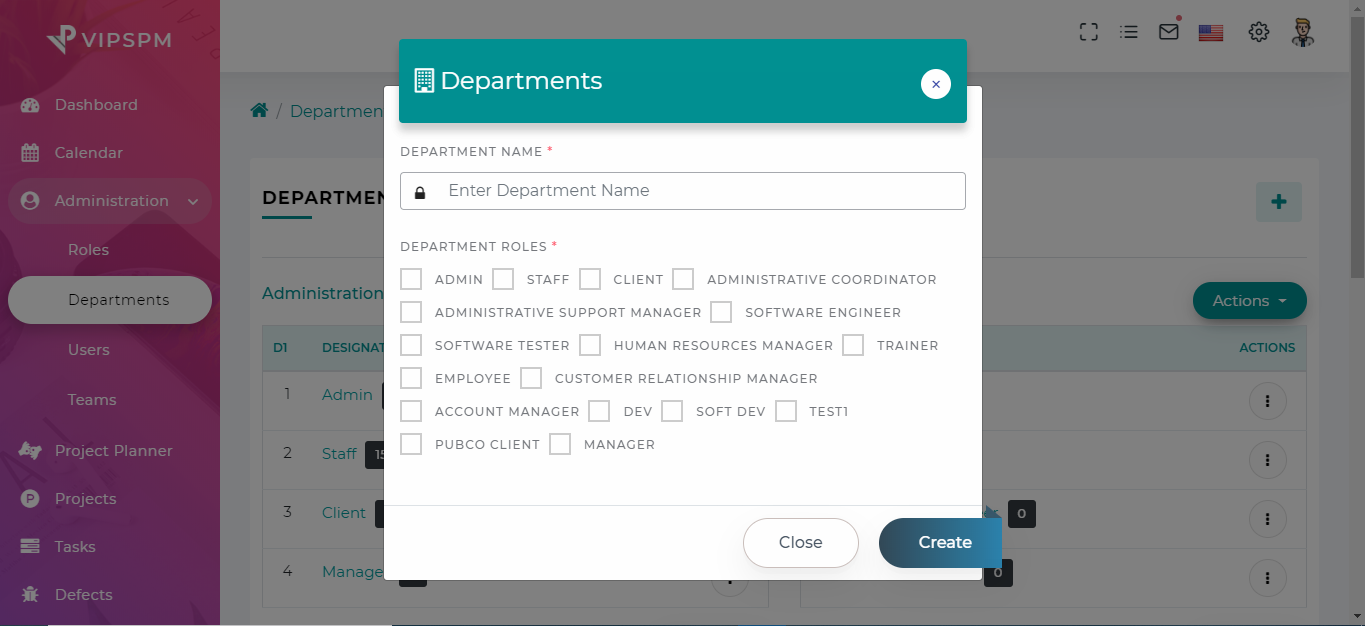
Departments
- Create/Edit/Delete multiples departments
- Assign departments wise multiples roles and permissions.
- Remove departments wise roles and permissions.
Users
- Create/Edit/Delete multiples users
- Assign permissions(View, edit, delete) to other users.
- Invite users
- Manage Avatars
- Assign Primary and Secondary manager to User
- Import users via CSV file
- Export csv, excel and pdf files
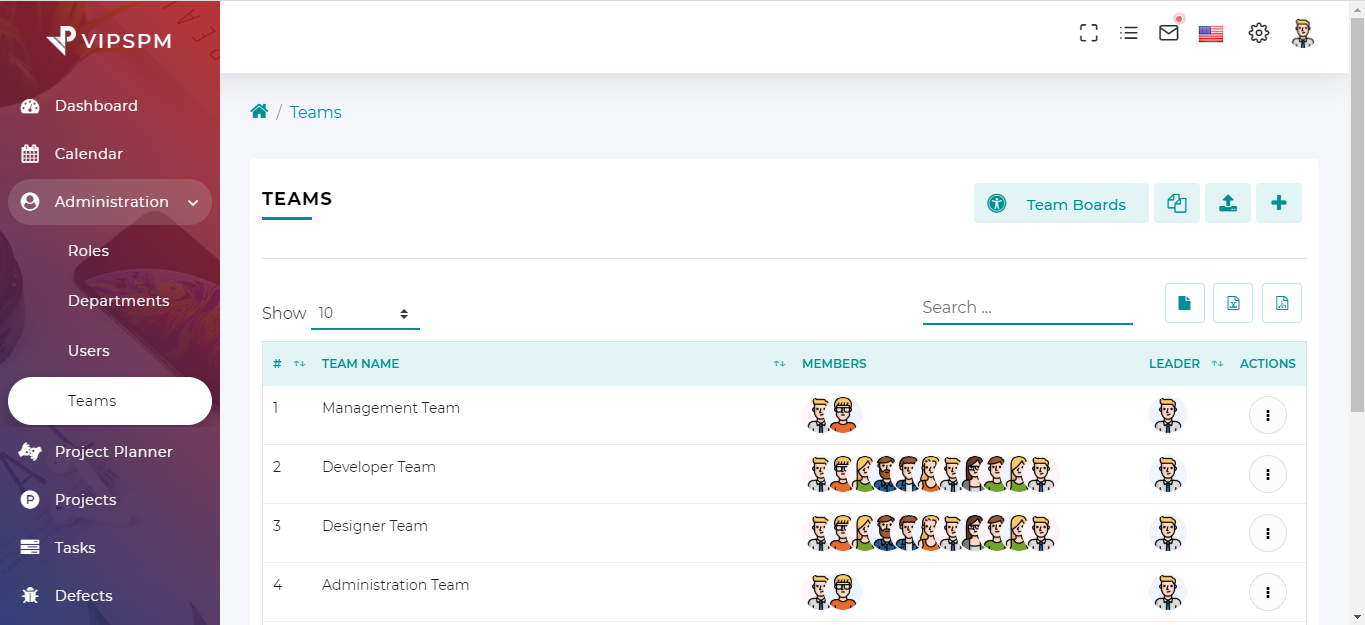
Teams
- Create/Edit/Delete multiples teams with team leader
- Import team via CSV file
- Before importing teams, make sure that you had import required users.
- Export csv, excel and pdf files
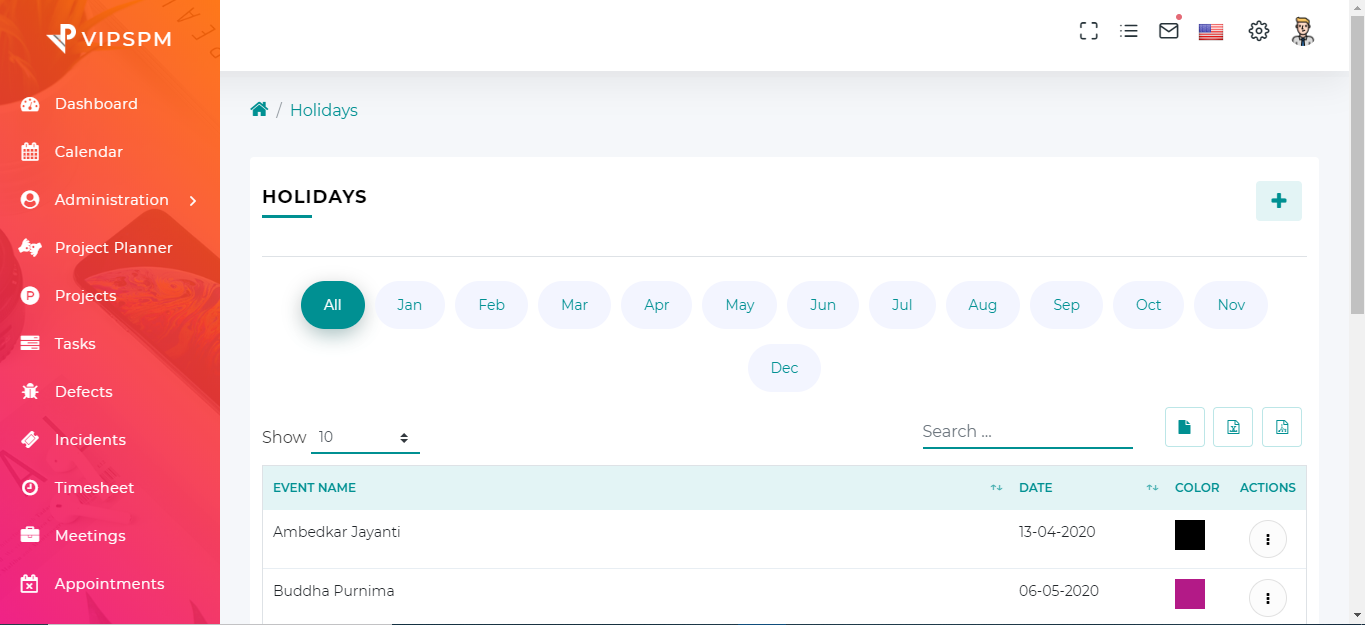
Holidays
- Create/Edit/Delete/View multiples holidays
- Locationwise holidays
- Export csv, excel and pdf files
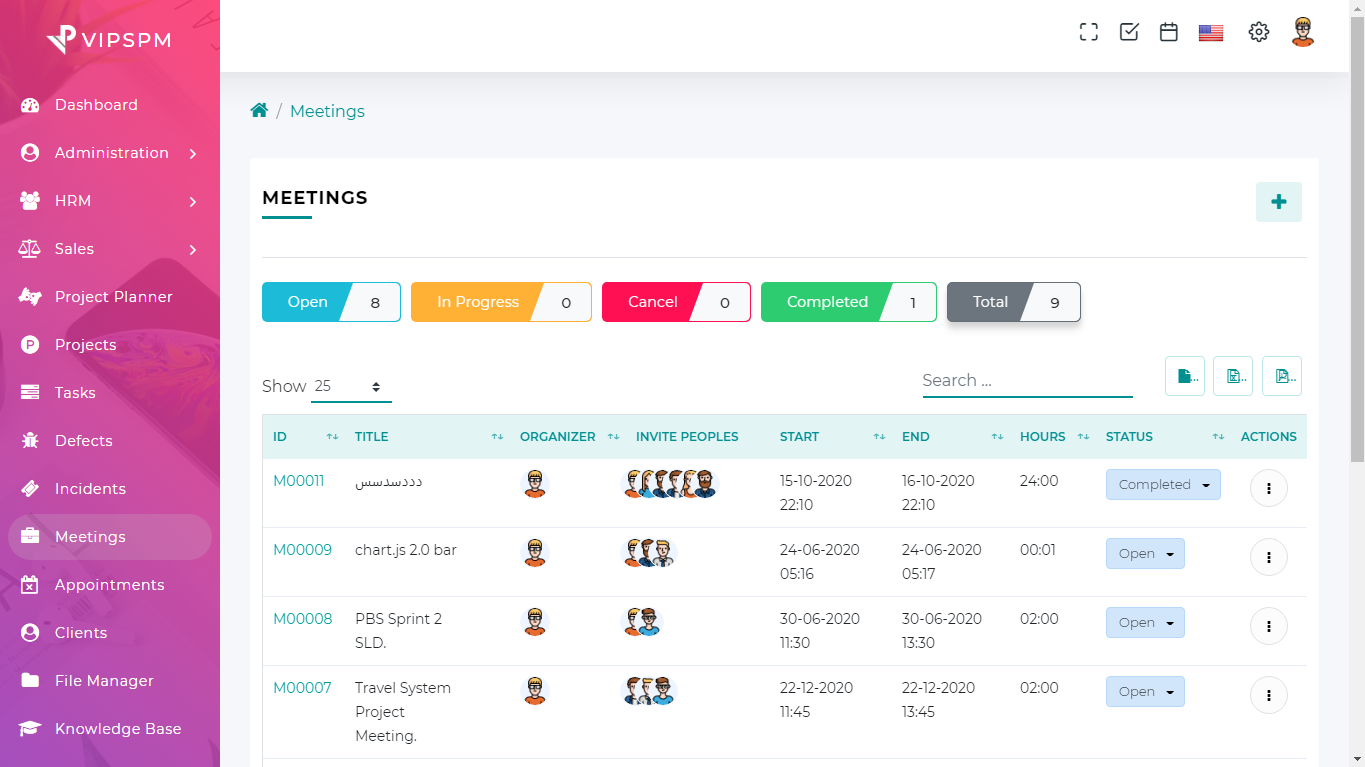
Meetings
- Schedule multiples meetings
- Edit/Delete/Cancel meetings
- Meetings will be added to timesheet
- Export csv, excel and pdf files
- in sigle meeting, multiple user can create timesheet
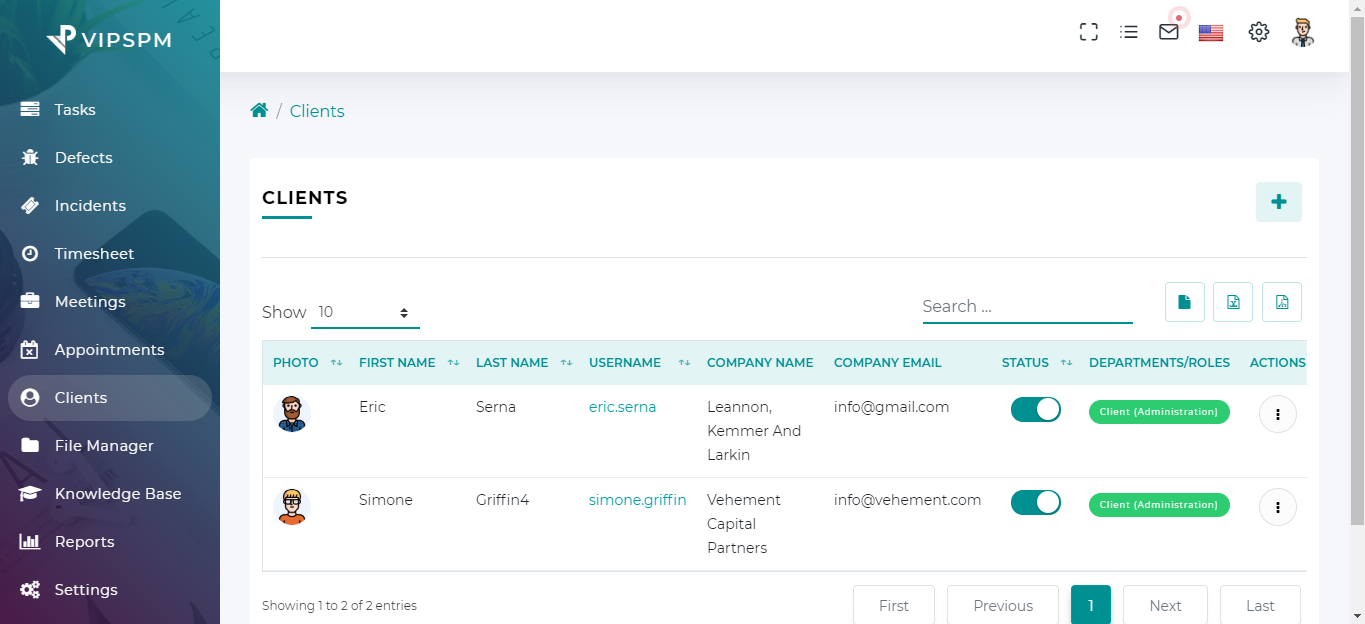
Clients
- Manage multiples clients
- Clients have only one roles client.
- Create/Edit/Remove clients
- View clients
- Export csv, excel and pdf files
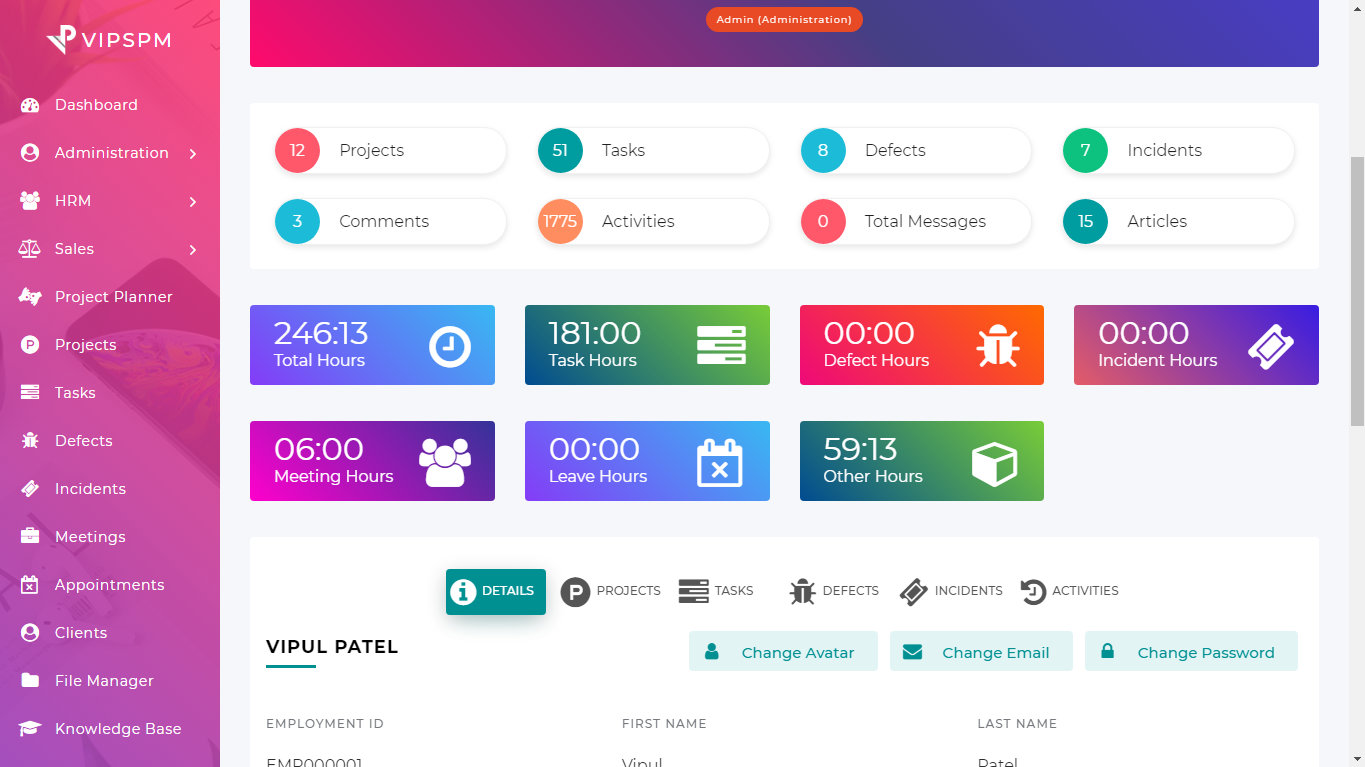
User/Client Profile
- Counts user projects, tasks, defects, incidents, comments, activities, articles, messages etc.
- Show total hours of projects, tasks, defects, incidents, leaves and meetings
- Change user avatar, email and password
- User details, projects, tasks, defects, incidents and activities of user.
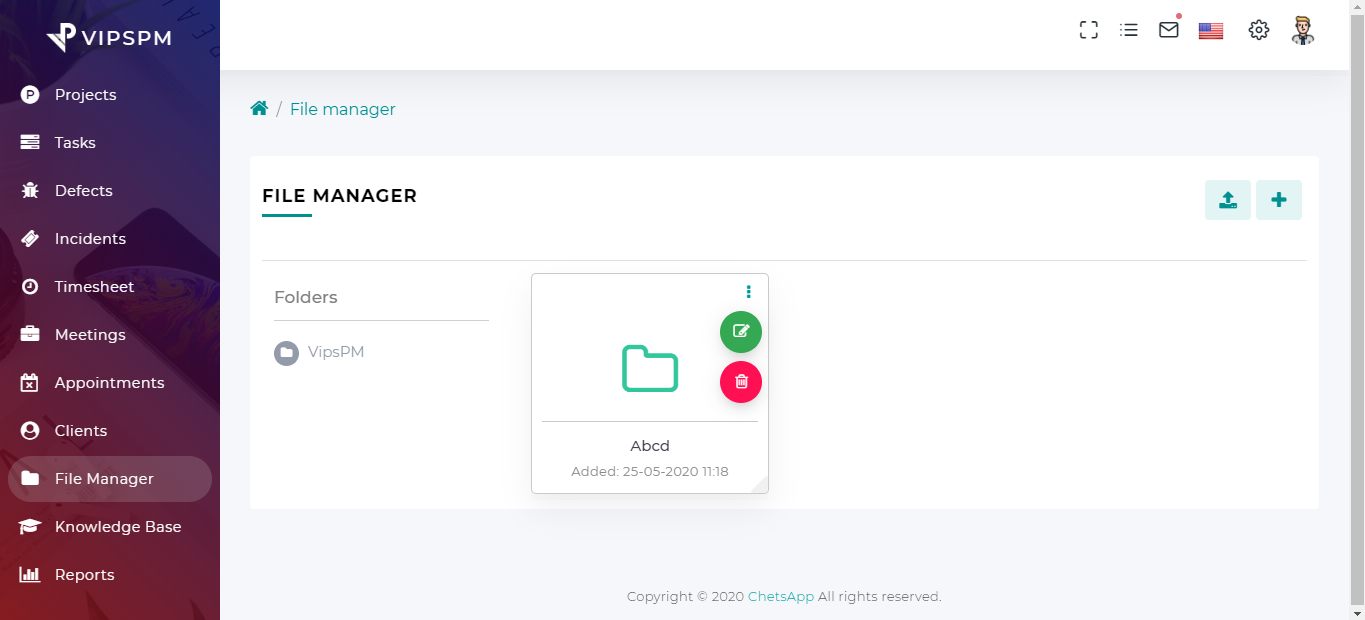
File Manager(Media library)
- Create multiple folders(Nested folders)
- Upload multiples files
- Edit folders and files name
- Download files
- Remove folders and files
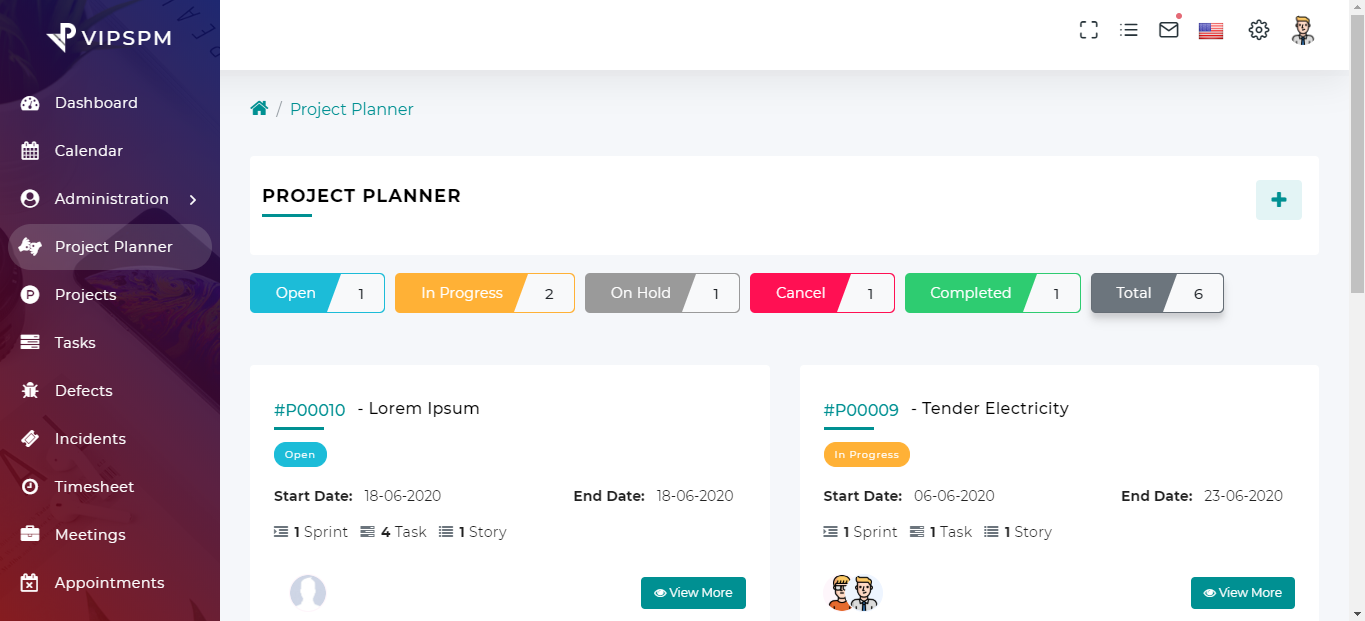
Project Planner
- Create projects, sprints, tasks and stories.
- Edit/Delete projects, sprints, tasks and stories.
- View project planner.
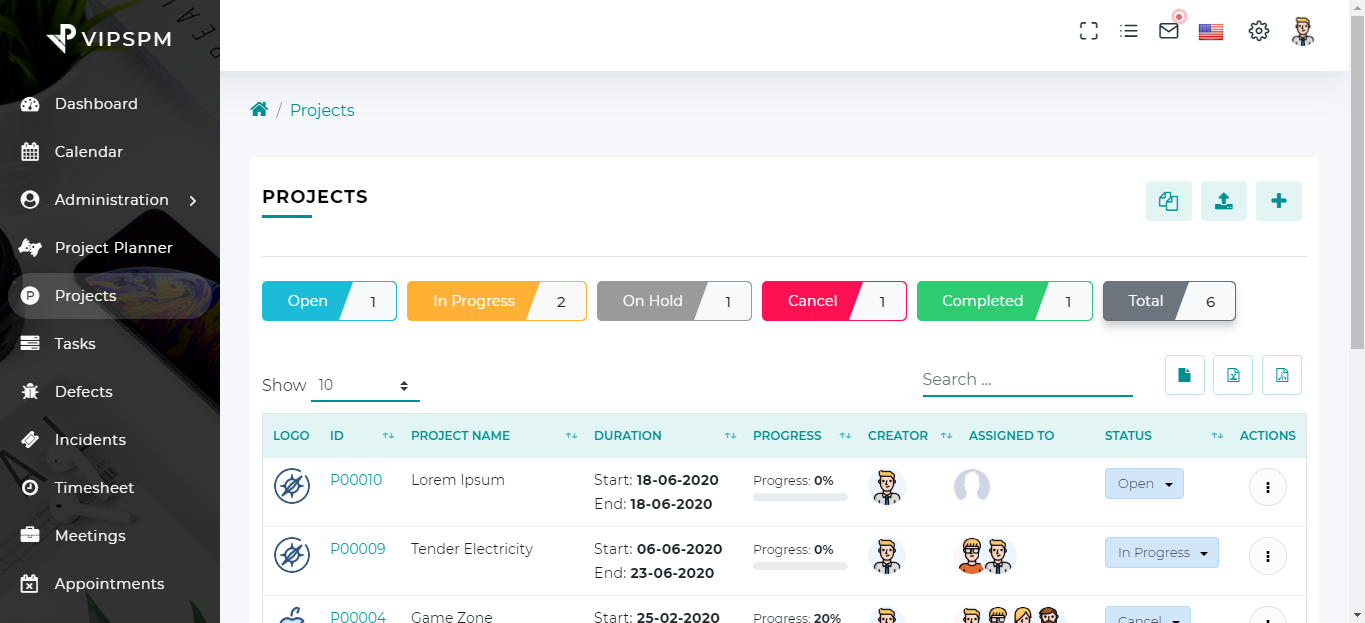
Projects
- Create multiple projects with custom fields.
- Assign team members to projects.
- Set budgets and time.
- Set start and due date of projects.
- Set the progress and status of the projects.
- View, edit and delete projects.
- Download sample CSV file for project import.
- Import projects via CSV file.
- Export csv, excel and pdf files
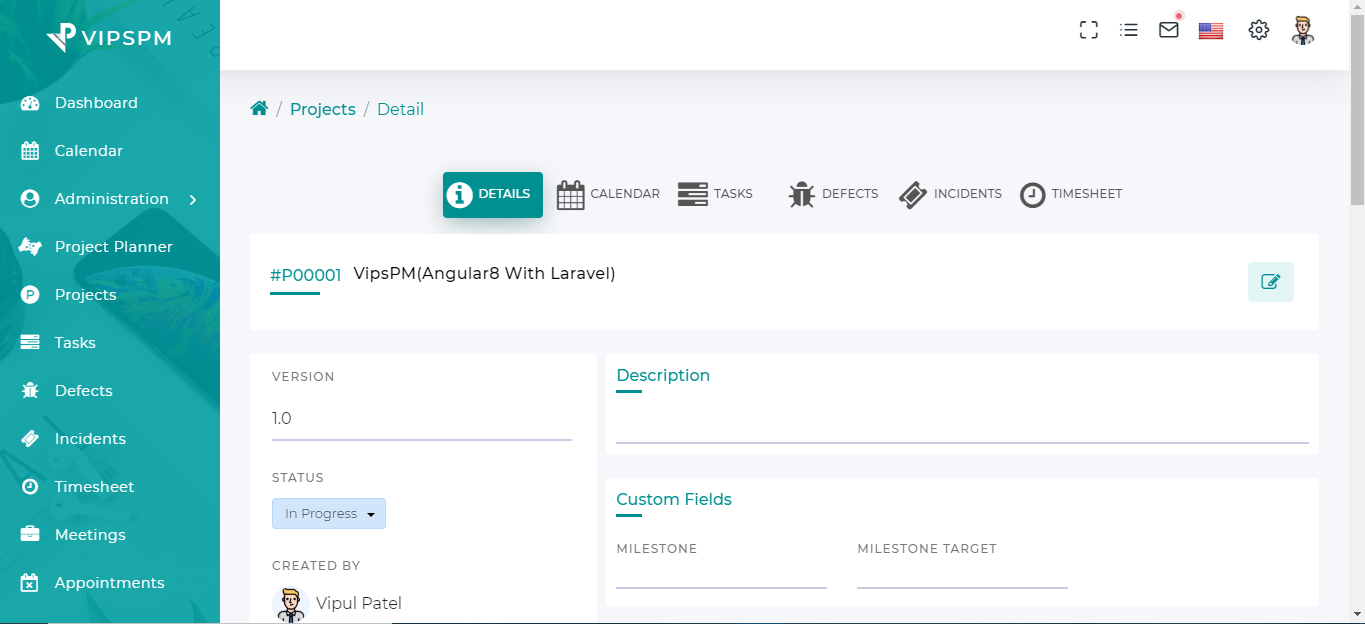
Project Details
- Inline editing in project detail fields.
- Show project progress and status.
- Custom fields
- Projects and their tasks, sub-tasks, defects, incidents with due dates.
- Add/Remove project comments.
- Add/Remove project attachments.
- Add/Edit project todos.
- Update project note.
- Project activities.
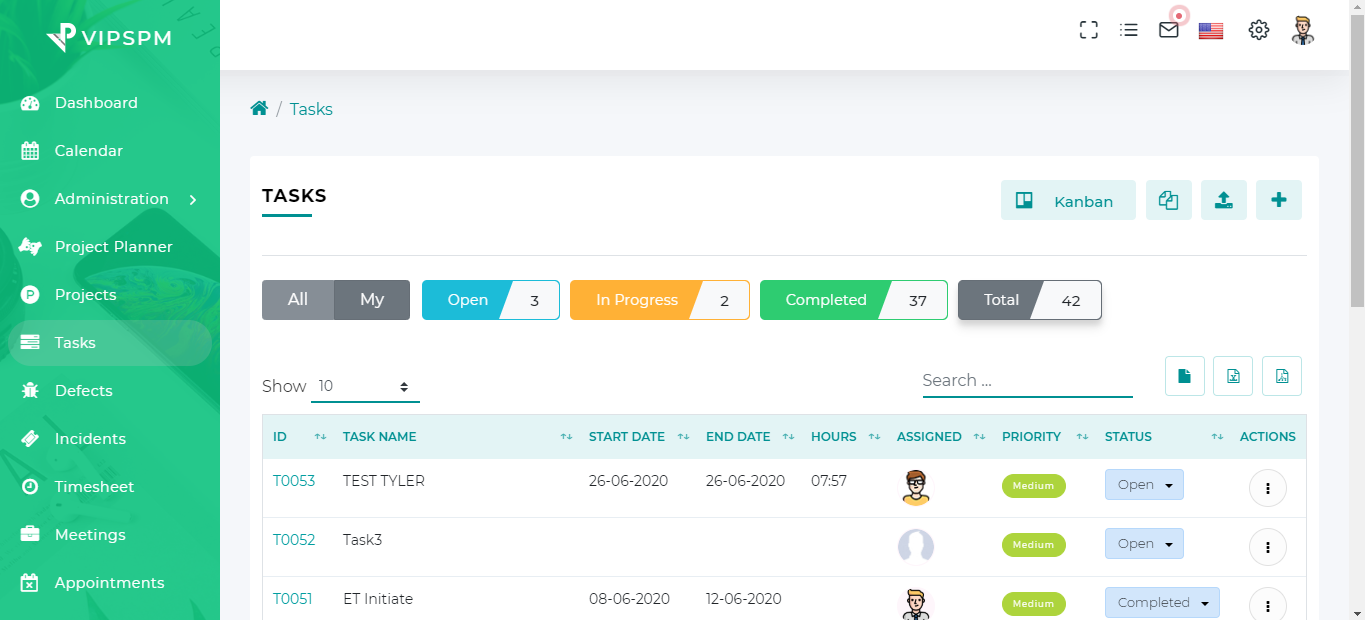
Tasks
- Create multiple tasks with custom fields for specific projects.
- Create sub-tasks of any parent task.
- Assign project members to tasks.
- Set start and due date of tasks.
- Set the progress, Overdue and status of the tasks.
- Set priorities and estimated hours of the tasks.
- Copy, View, edit and delete tasks.
- Download sample CSV file for tasks import.
- Import tasks via CSV file.
- Export csv, excel and pdf files

Task Details
- Inline editing in task detail fields.
- Show task progress, estimated hours and actual hours.
- Change task status.
- Project with version.
- Custom fields
- Add/Remove task comments.
- Add/Remove task attachments.
- Add/Edit task todos.
- Add/Edit/Remove task timesheet.
- Add task note.
- Task activities.
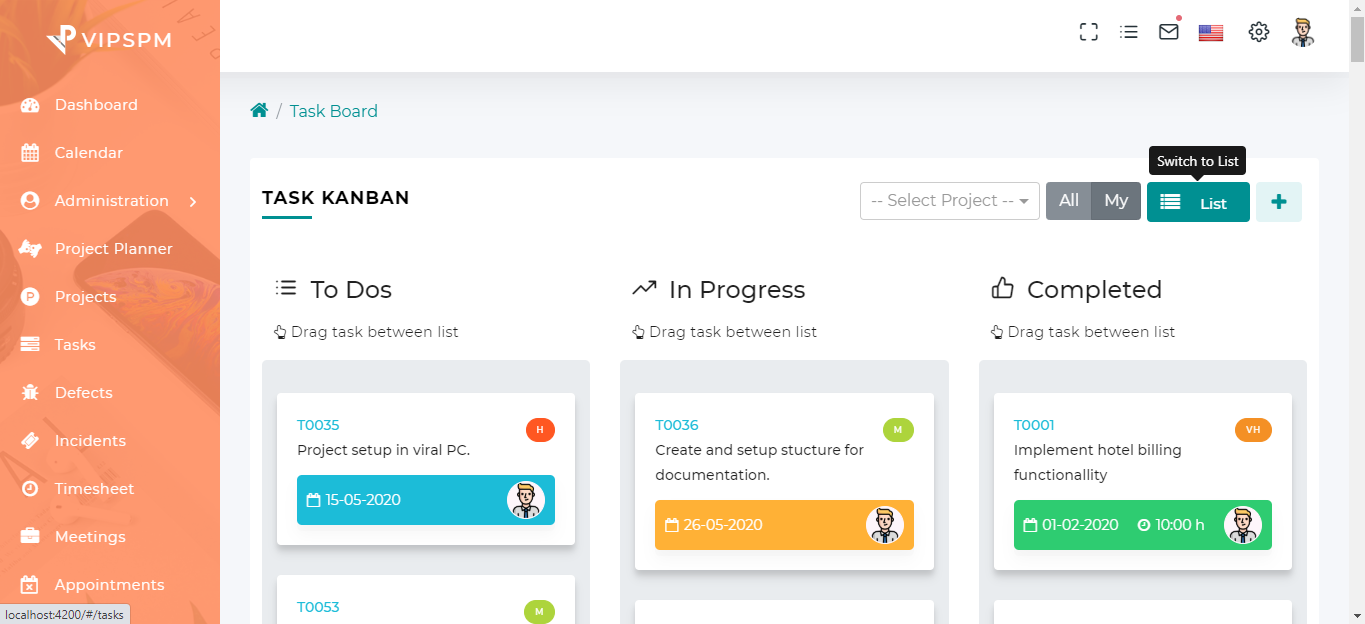
Task board(Kanban View)
- Display kanban view of tasks.
- Change the status of tasks using drag and drop.
- Create task.
- View task details.
- Edit/Delete task.
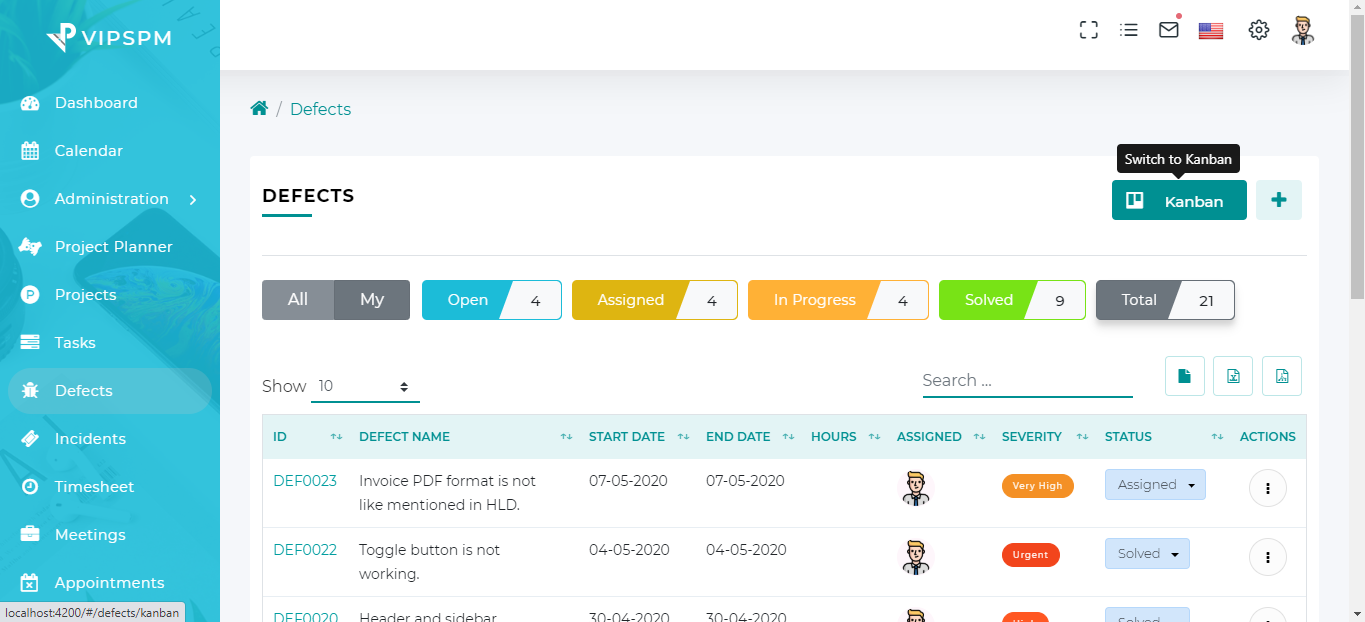
Defects
- Create multiple defects with custom fields for specific projects.
- Assign team members to the defect.
- Set the severity and status of defects.
- Set defect types.
- View, edit and delete defects.
- Export csv, excel and pdf files
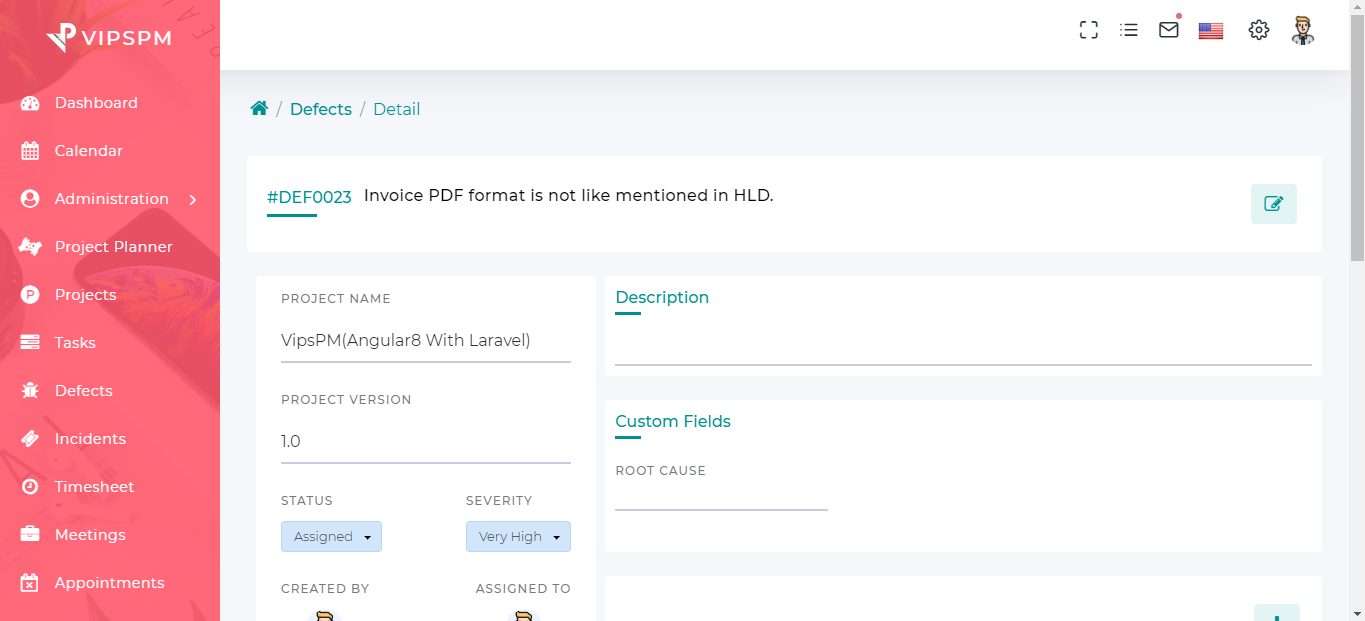
Defect Detail
- Inline editing in defect detail fields.
- Show the severity and status of defect.
- Show the defect created and modify dates.
- Custom fields
- Add/Remove defect comments.
- Add/Remove defect attachments.
- Add/Edit defect todos.
- Add/Edit/Remove defect timesheet.
- Add defect notes.
- Defect activities.
- Defect histories.

Incidents (Tickets)
- Create multiple incidents with custom fields for specific projects.
- Assign team members to incidents.
- Set priority and status of incidents.
- Set incident type.
- View, edit and delete incidents.
- Export CSV, excel, pdf file.
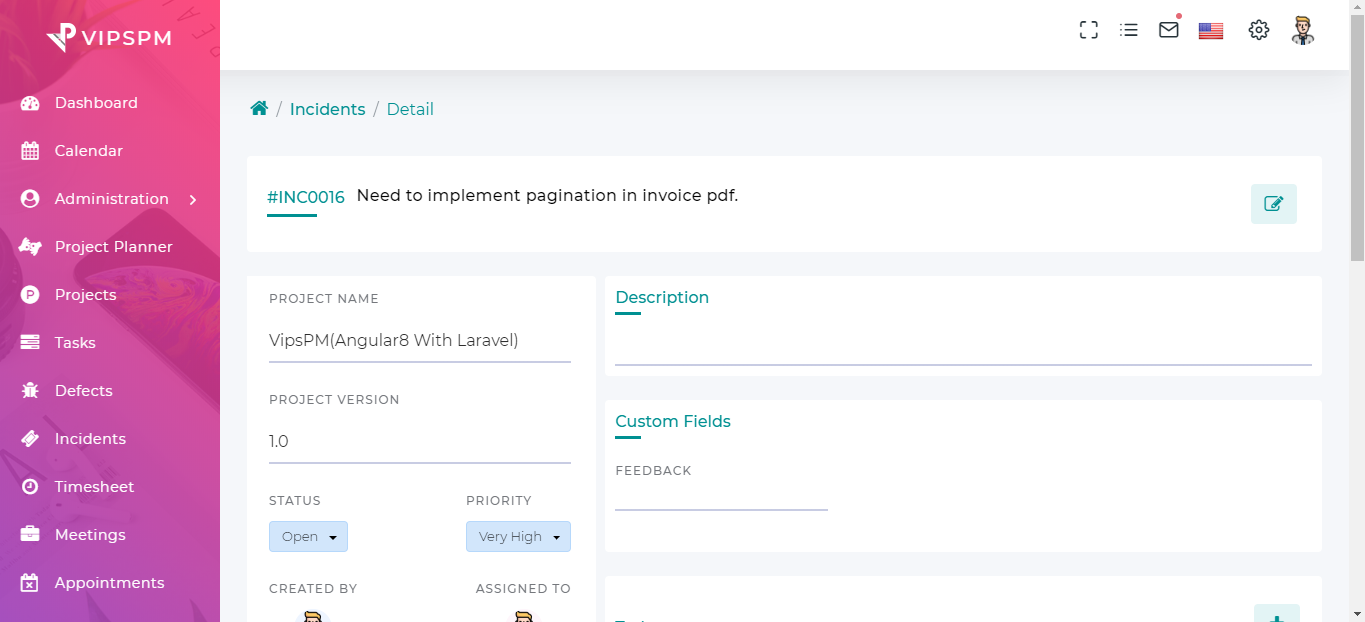
Incident(Ticket) Detail
- Inline editing in incident detail fields.
- Show the priority and status of the incident.
- Show incident created and modified dates.
- Custom fields
- Add/Remove incident comments.
- Add/Remove incident attachments.
- Add/Edit/Remove incident timesheet.
- Add/Edit incident todos.
- Add incident notes.
- Incident activities.
- Incident histories.
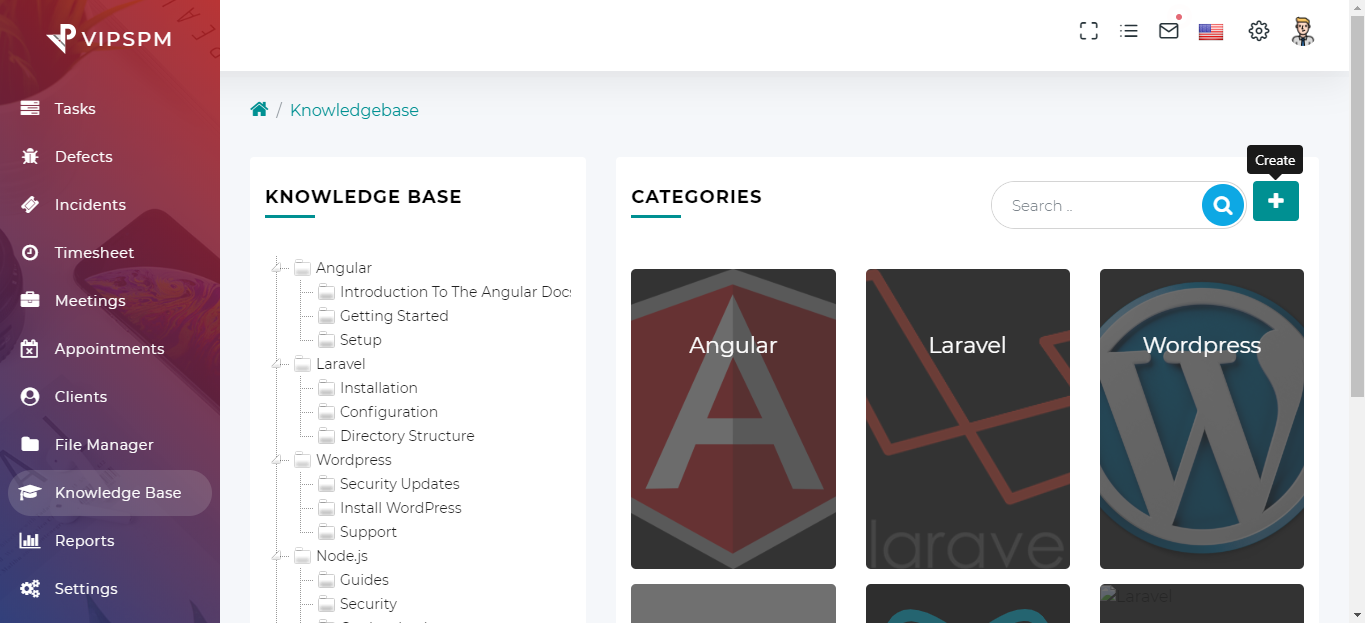
Knowledgebase
- Create knowledgebase with categories and articles.
- Create categories.
- Search articles.
- Create articles in categories.
- View/Edit/Delete categories.
- View/Edit/Delete articles.
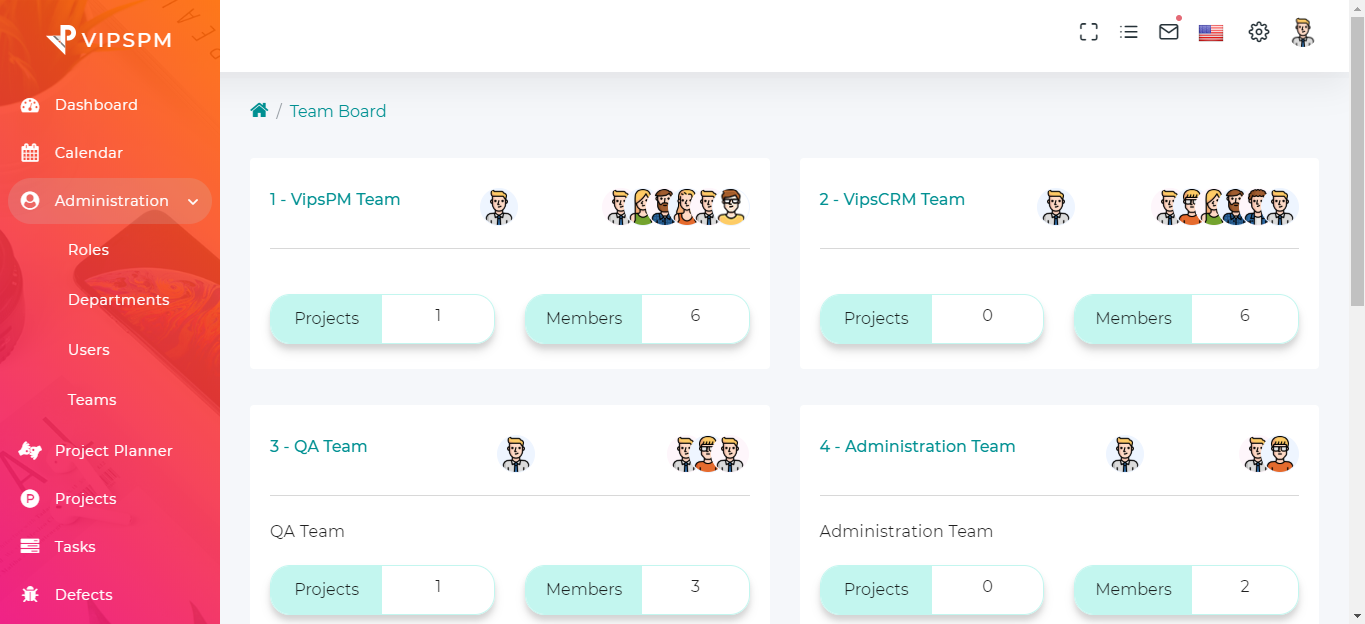
Teamboard
- Count assign projects to the team.
- Show team members and team leader
- Count team members.
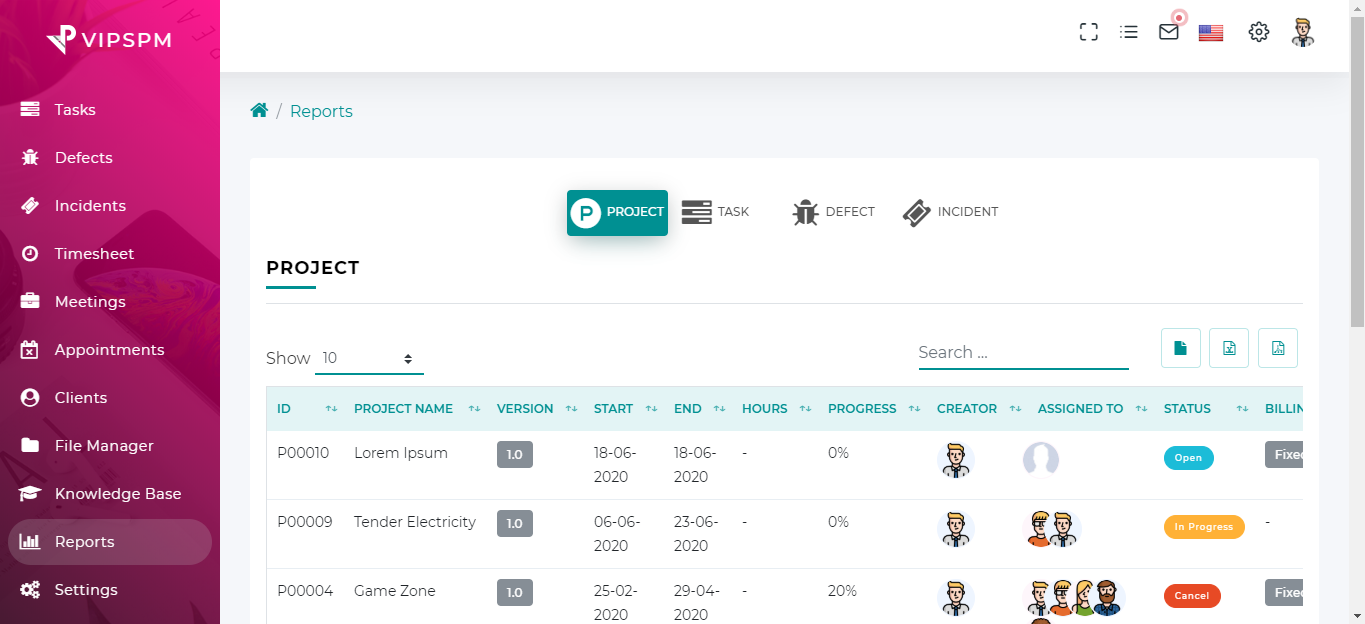
Reports
- Projects, tasks, defects and incidents's reports.
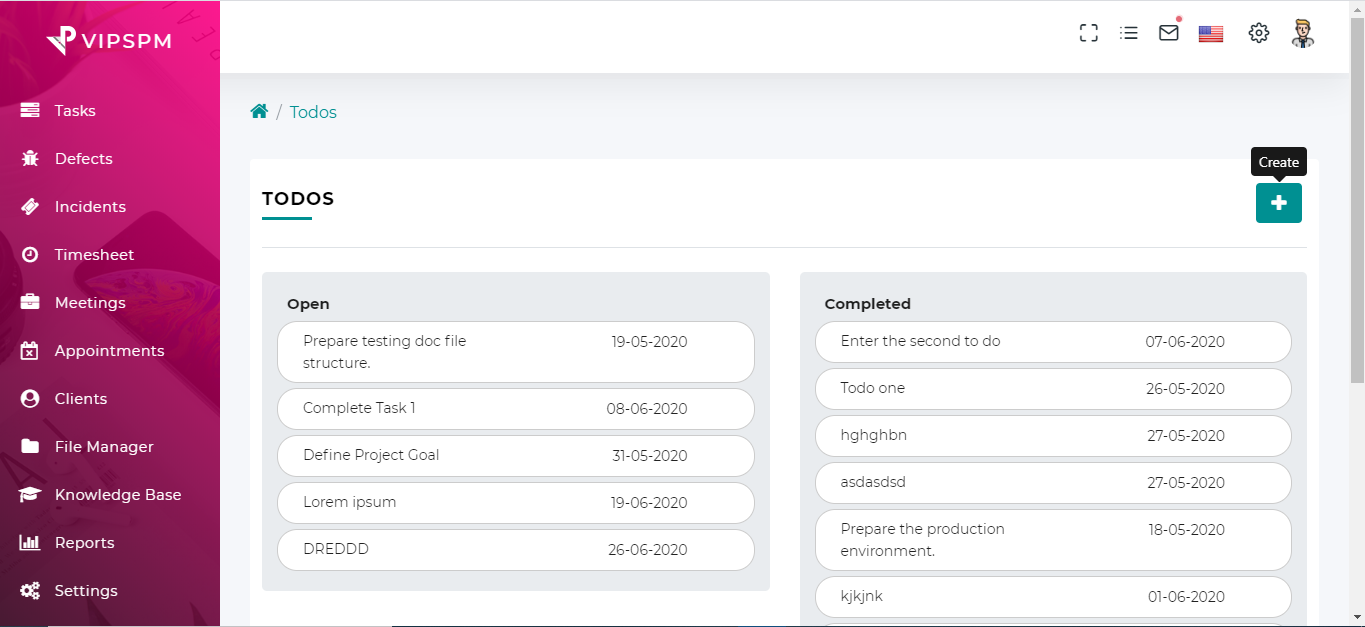
Todos
- Create/Edit/Delete todos.
- Change todo status(Open, Completed)
- Open todos from the dashboard todos list.
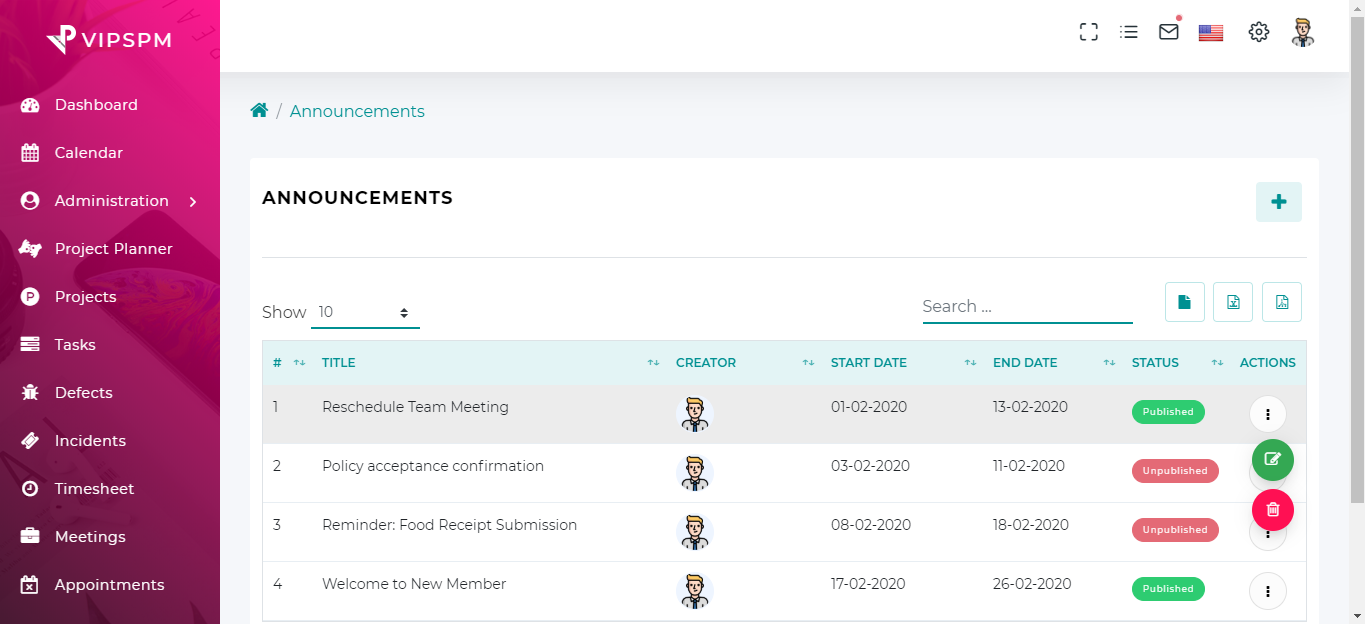
Announcements
- Create an announcement.
- Change start and due date.
- Send announcements to clients.
- Change announcement status.
- Export CSV, excel, pdf file.
- Open announcement from the dashboard's announcements list.
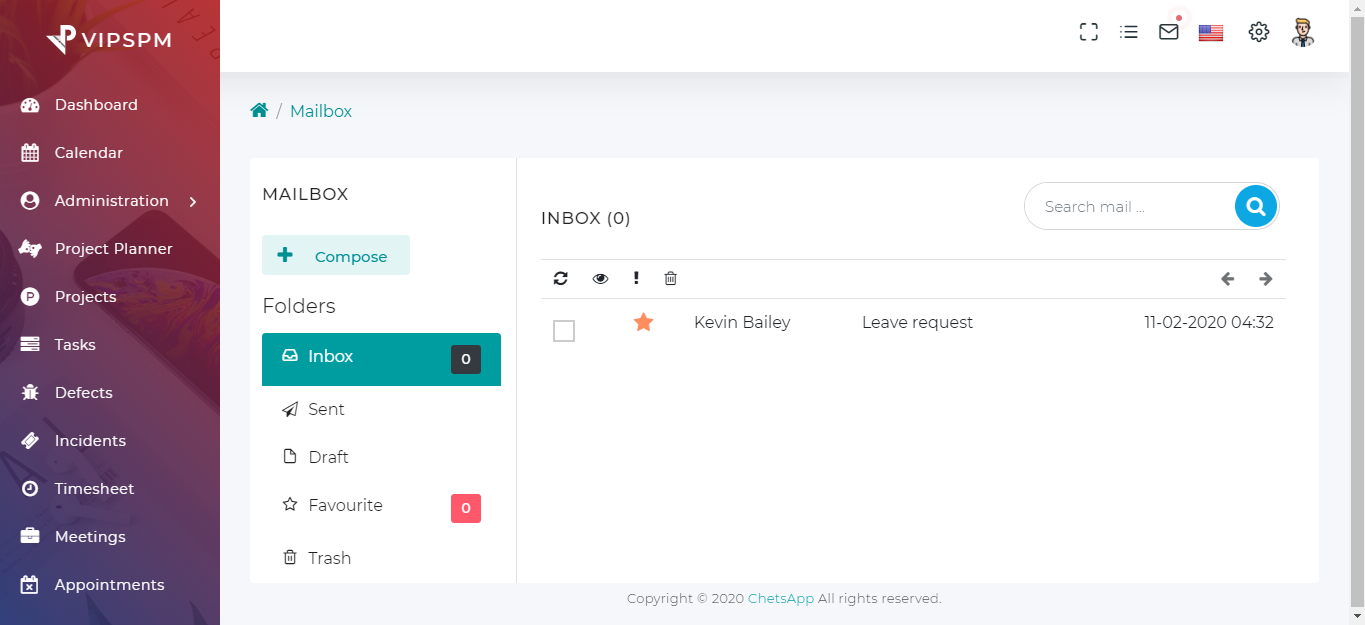
Mailbox
- Compose mail with attachments.
- Mail save as draft and discard.
- Set favorite mails.
- Mark as read mails.
- Open mailbox from the header menu item.
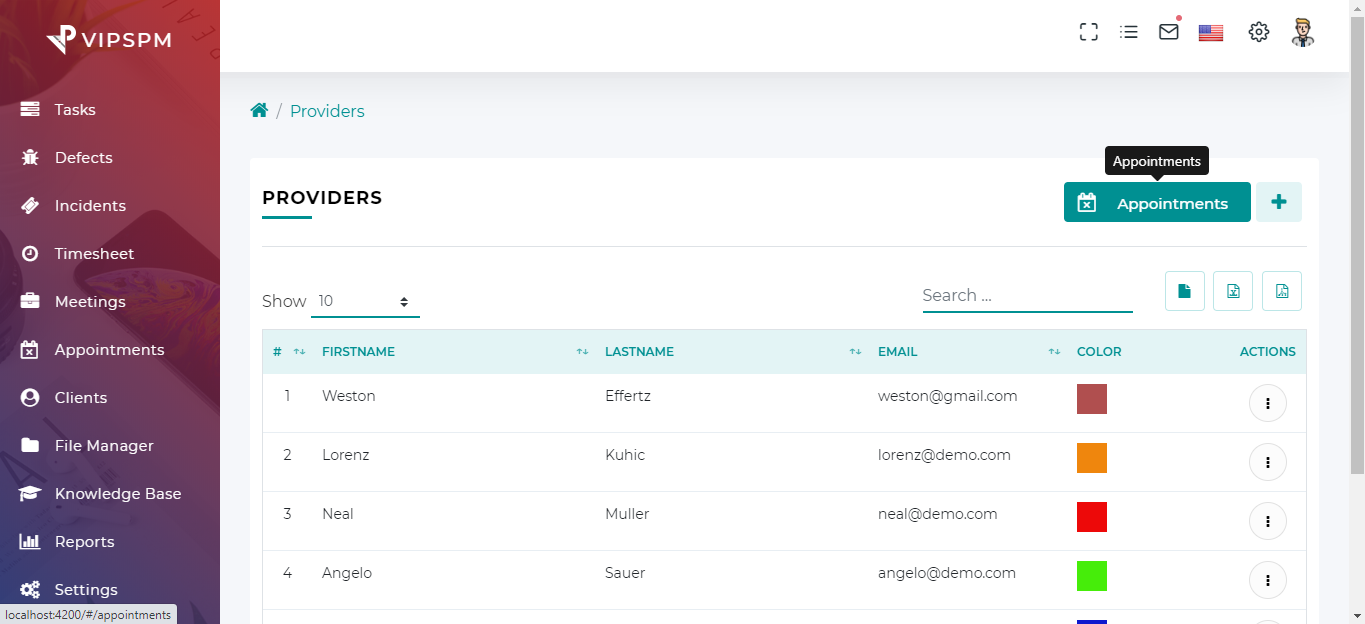
Providers
- Create providers for appointments.
- Update/Delete providers.
- Set appoitments colors.
- Export CSV, excel, pdf file.
Appointments
- Create appointments.
- Update/Delete appointments.
- Book appoitments on available dates.
- Send appointments notification to users.


Timesheet
- Timesheet allows the recording of working hours inside tasks, defects, incidents, meetings as well as manage from Timesheet module. Timesheet automatically sends time report to configured email.
9 Settings
Here you can get full guide about, how to get and configure settings of the VipsPM tool.
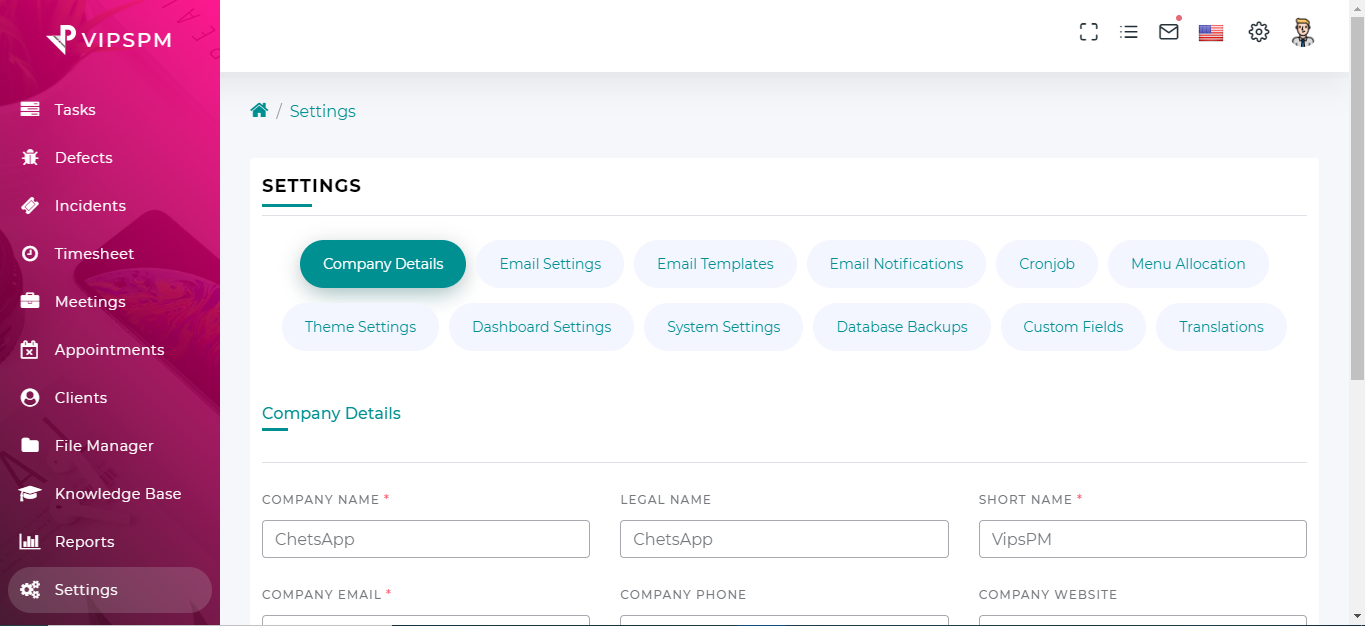
Company Detail
- Change your company name, legal name, short name and other details related to your environments.
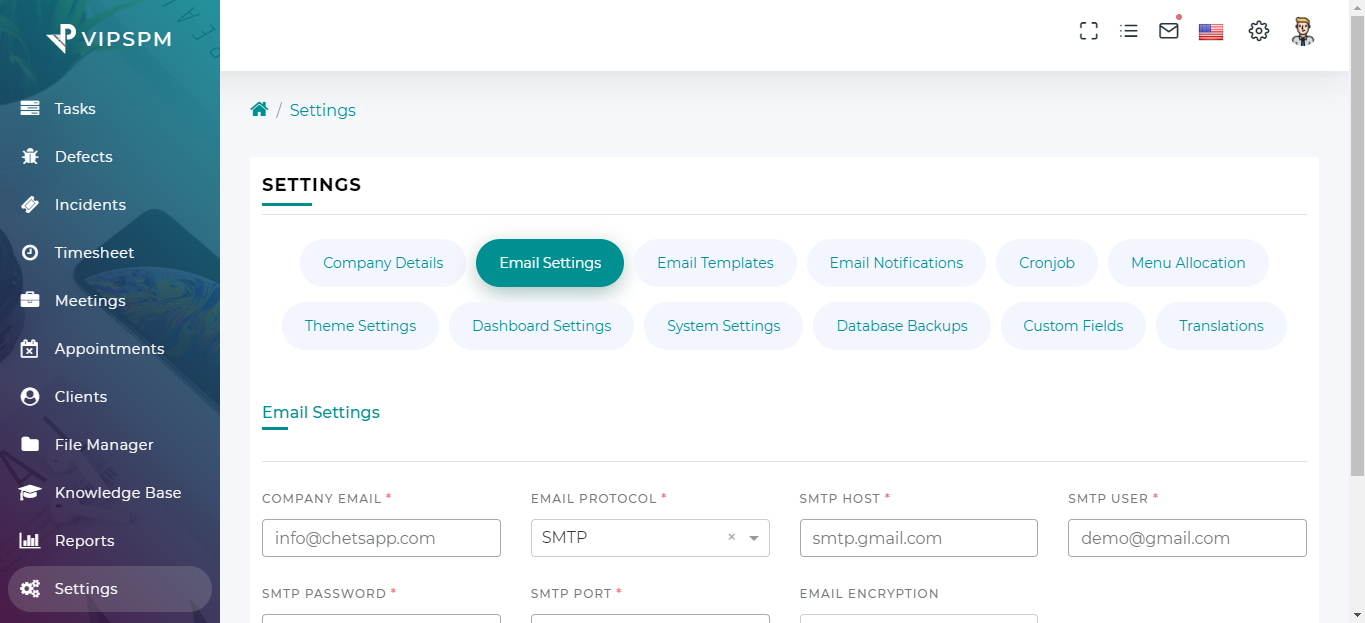
Email Settings
- Change your mail settings.
- Mail settings used during authentication, projects, tasks, defects, and incidents etc...
- You can manually change your mail settings in
.envfile.
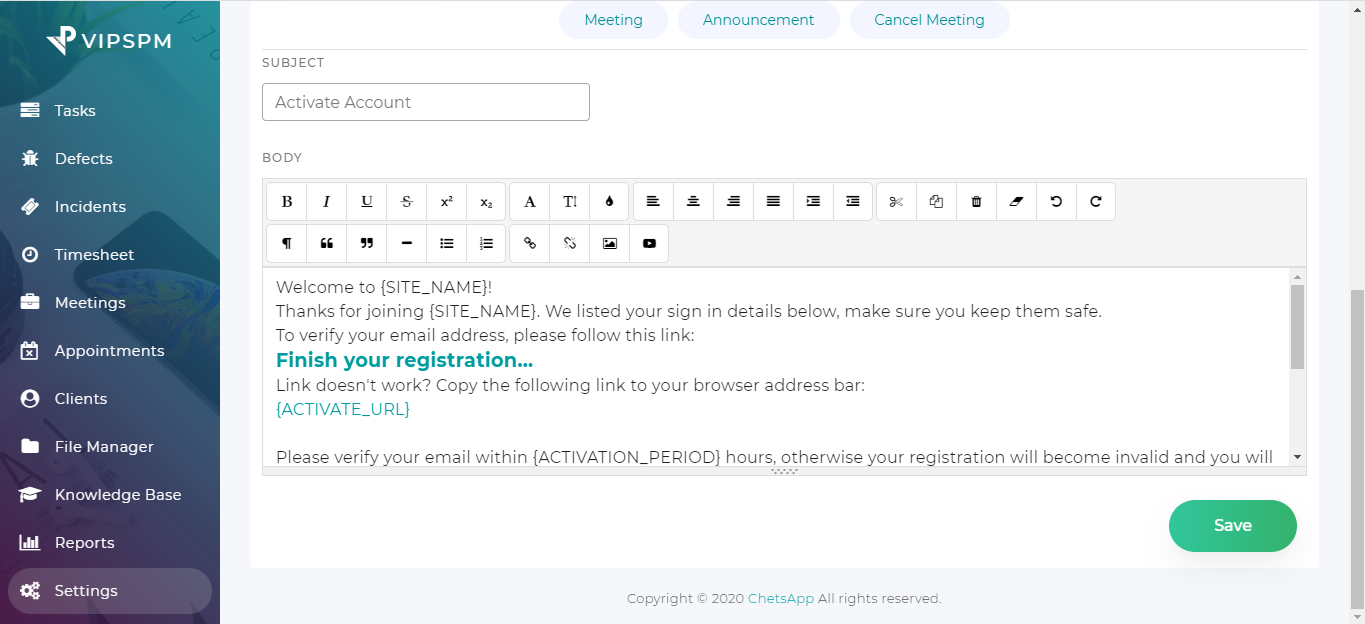
Email Templates
-
You can change the content of email templates. but Don't change the variables name defined in
{}and link text.
For Exa.
{USERNAME}
Finish your registration...
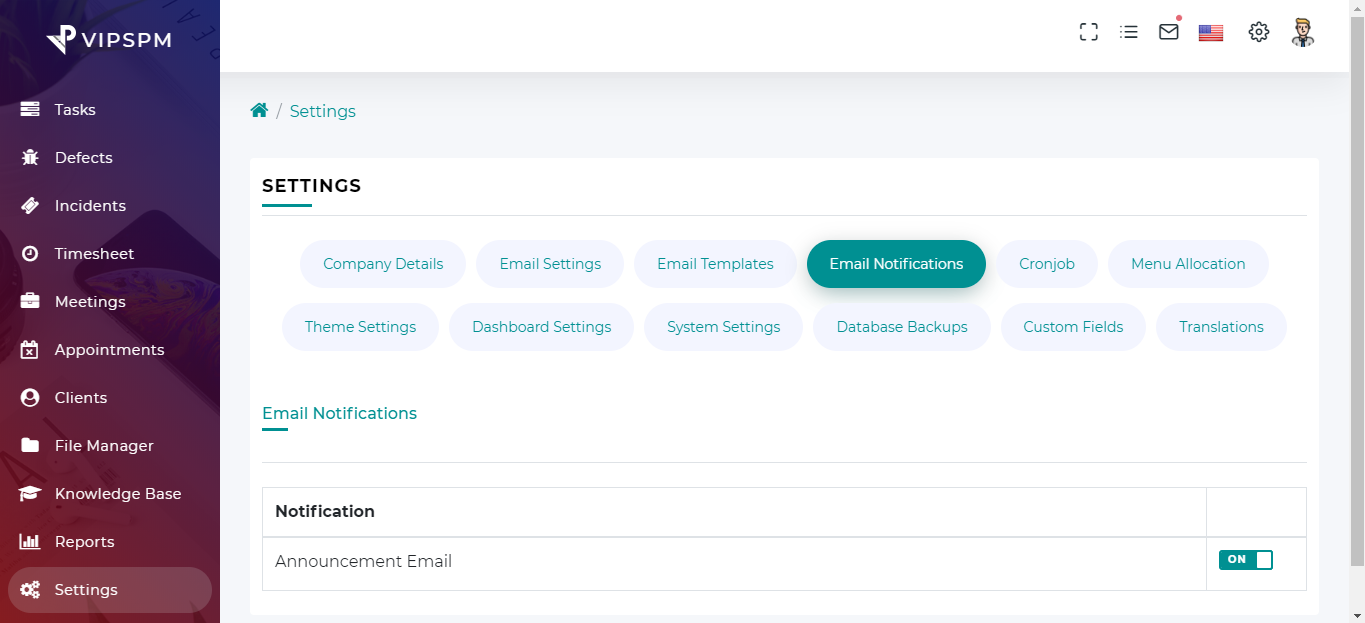
Email Notification
- Active/Inactive email sending.
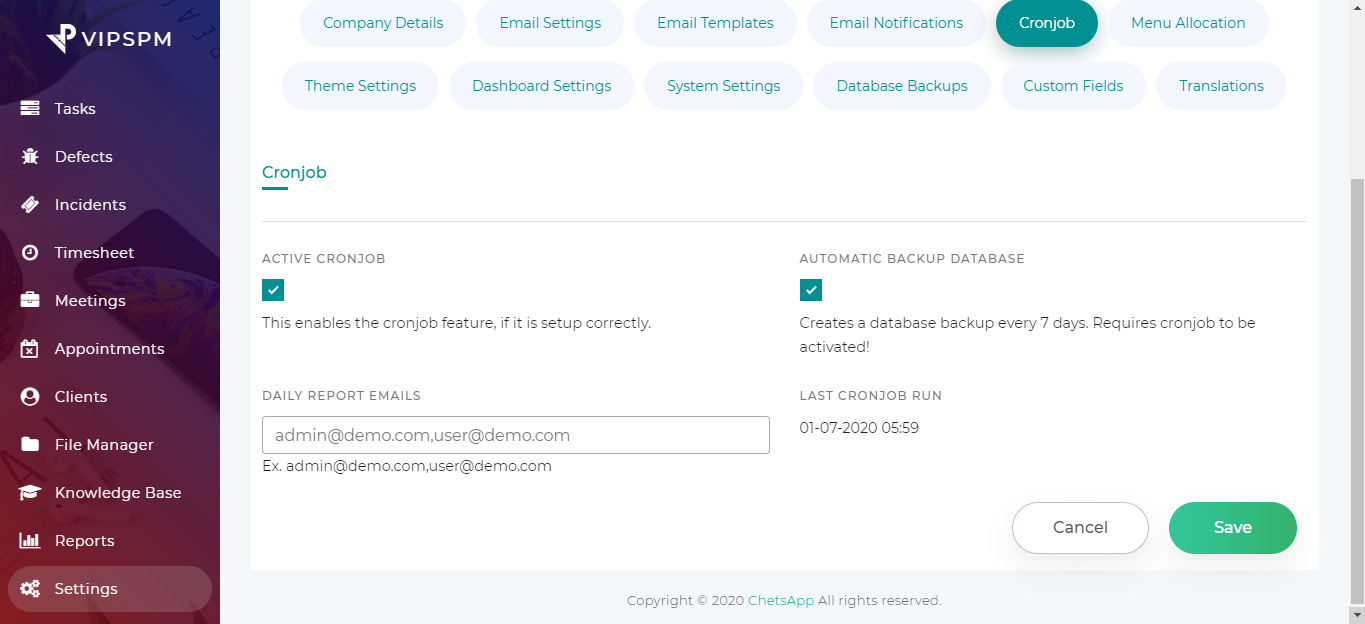
Cronjob
- Enable cronjob for the Email queue, Weekly database backup, Daily task reports email to users, Announcement and Leave status update.
- Project, Task, Defect, Incident, Appointment and Meeting start reminder.
- Project, Task, Defect and Incident overdue reminder.
- Estimate and Invoice due reminder and Recurring invoice.
- You have to manually create cronjob on your server for use these features.
- When using the scheduler, you only need to add the following Cron entry to your server.
* * * * * cd /path-to-your-project && php artisan schedule:run >> /dev/null 2>&1 - Do not forget to replace /path/to/artisan with the full path to the Artisan command of your laravel application.
- This Cron will call the Laravel command scheduler every minute. When the schedule:run command is executed, Laravel will evaluate your scheduled tasks and runs the tasks that are due.
- For more info read the following documentation:
Task Scheduling | Setting up cronjob
If you are feeling stuck to create cronjob then ask for support to your hosting provider.
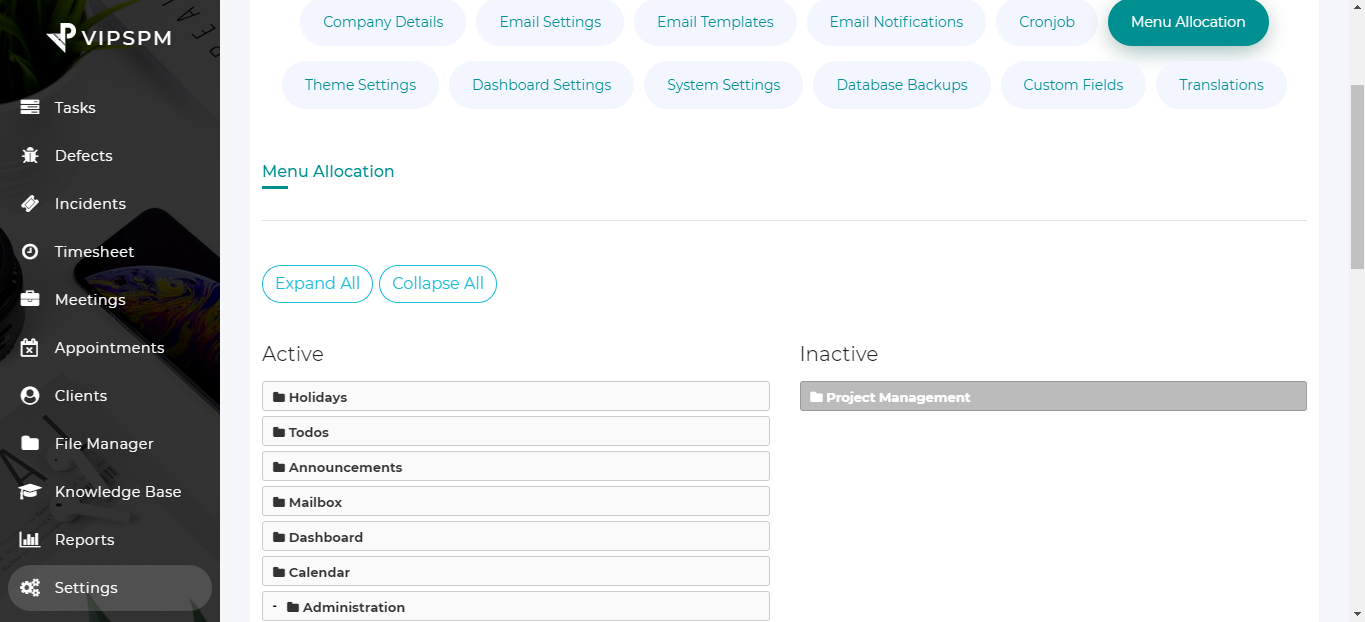
Menu allocations
- Active/Deactive menu items from the sidebar.
- Just drag and drop menu item from both the side.
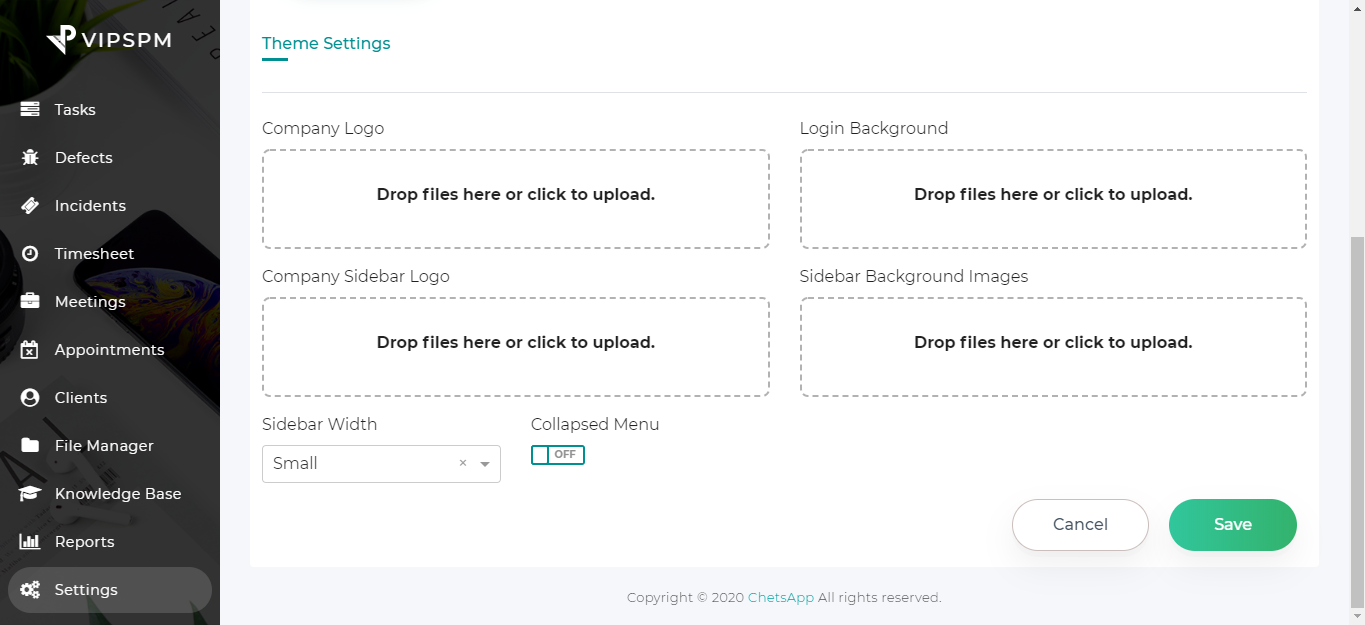
Theme Settings
- Change your company logo. Its display on auth pages.
- Change your auth pages(login, register, forgot and reset password) background image using login background feature.
- Change you sidebar top company logo using the company sidebar logo feature.
- Dynamically add sidebar background images using sidebar background images features. Set your sidebar background image by clicking top right side setting icons(Sidebar Layout Options).
- Set sidebar layout using sidebar width and collapsed menu.
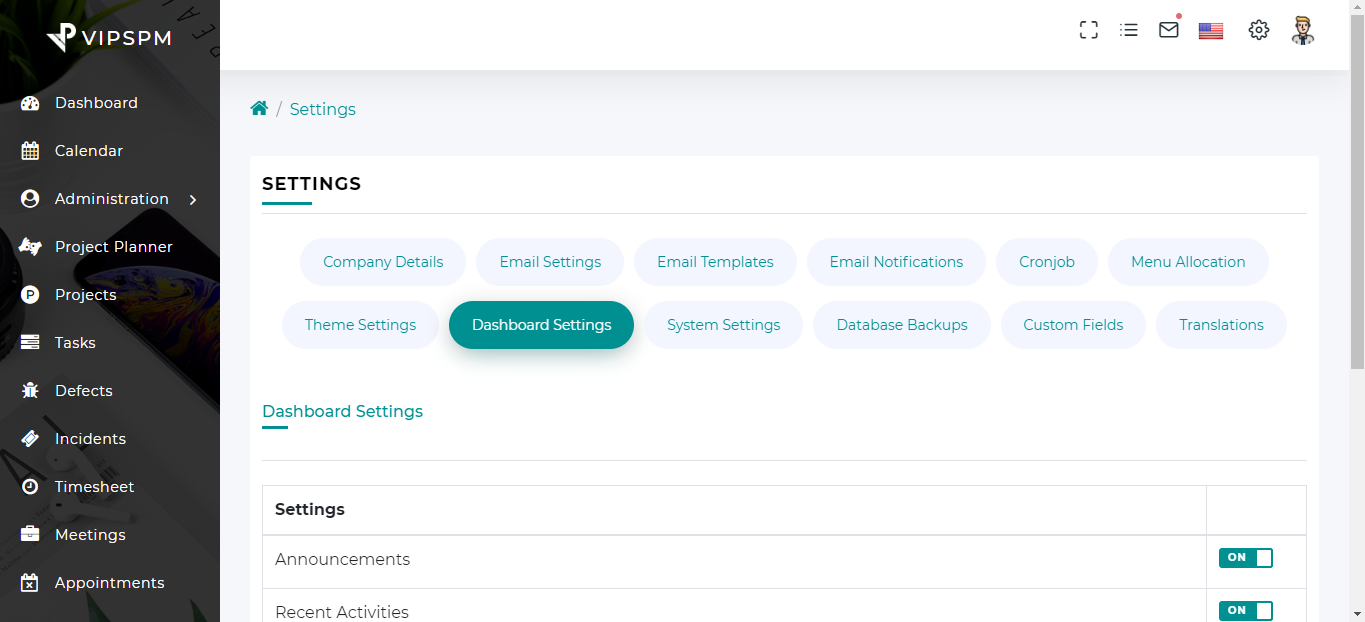
Dashboard Settings
- Hide/Show listing features of projects, tasks, defects, incidents, meetings, announcements, recent activities, todos list etc from dashboard.
System Settings
- Change timezone, default language, default currency, datatable pagination length, date format, time format and enable/disable registration button etc.
- Set datatable record length per page using tables pagination limits.

Translations(Languages)
- Change languages
- Delete languages
- Choose language for your application
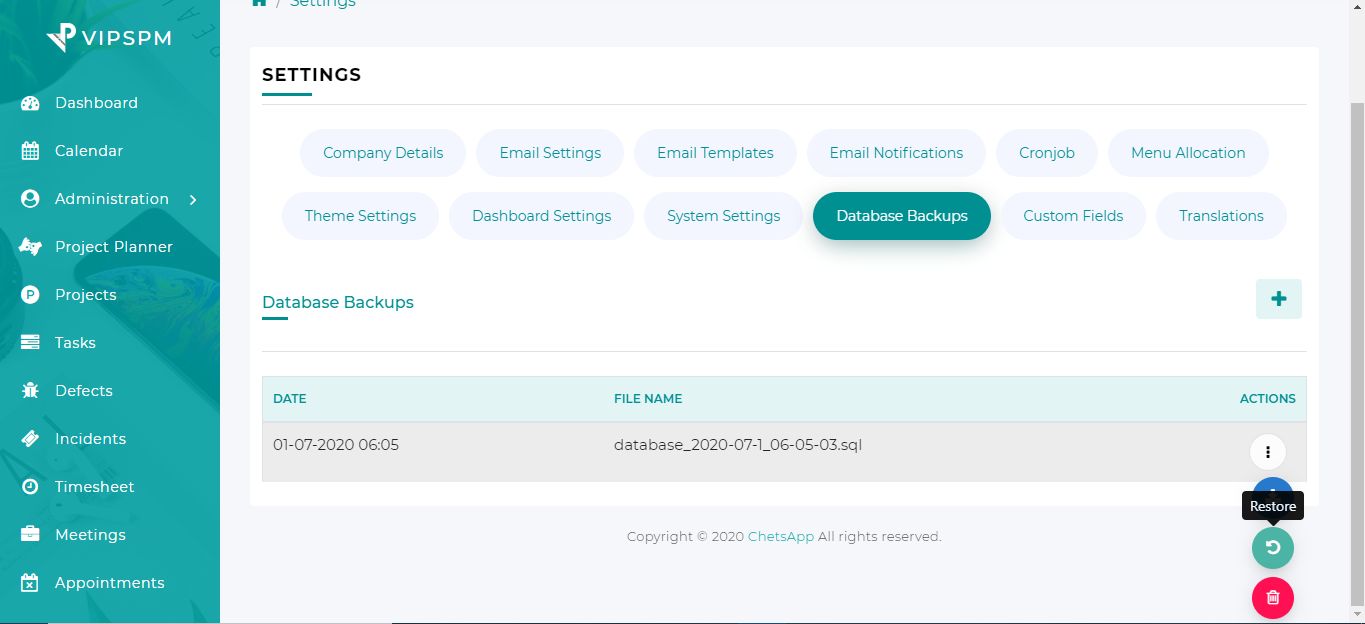
Database Backup
- Backup, restore and download database.
- You can also delete backup database.
- For autobackup database run the laravel schedular using cron.
- Or run the command:
php artisan db:backup-custom.
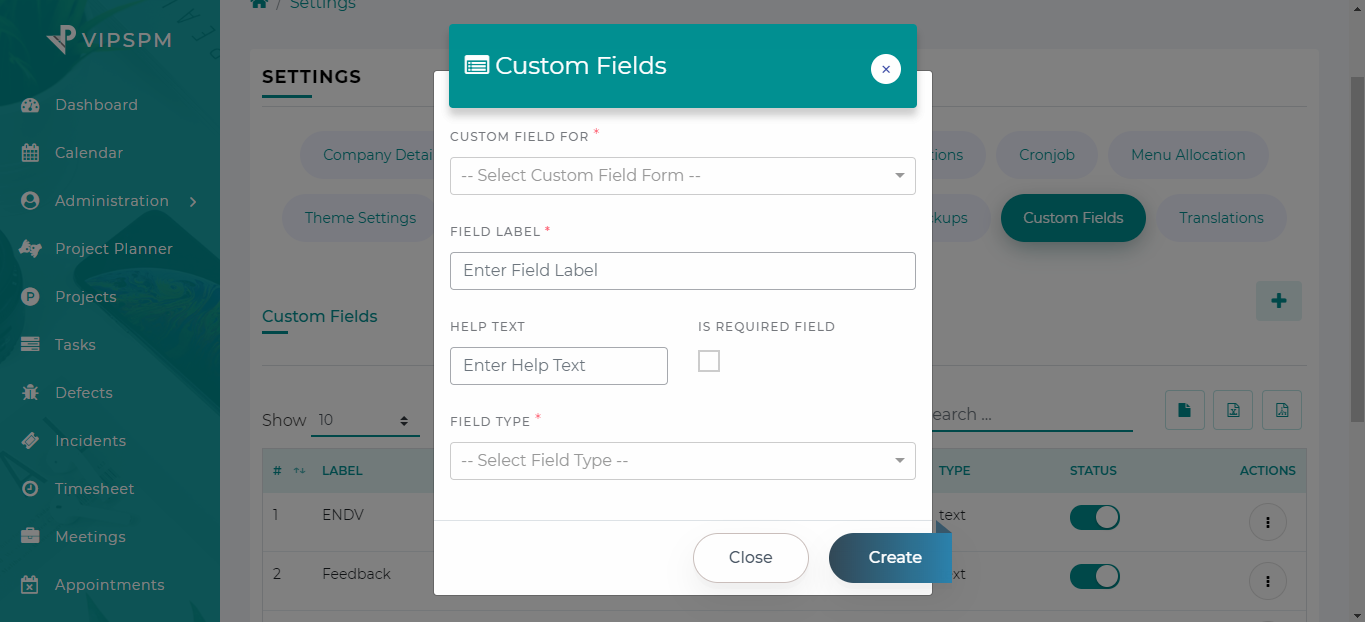
Custom Fields
- Add more fields on projects, tasks, defects and incidents using custom fields.
- Create custom fields based on your requirements.
- Edit/Delete custom fields.
- Only active custom fields display on projects, tasks, defects and incidents.
Slack Integration
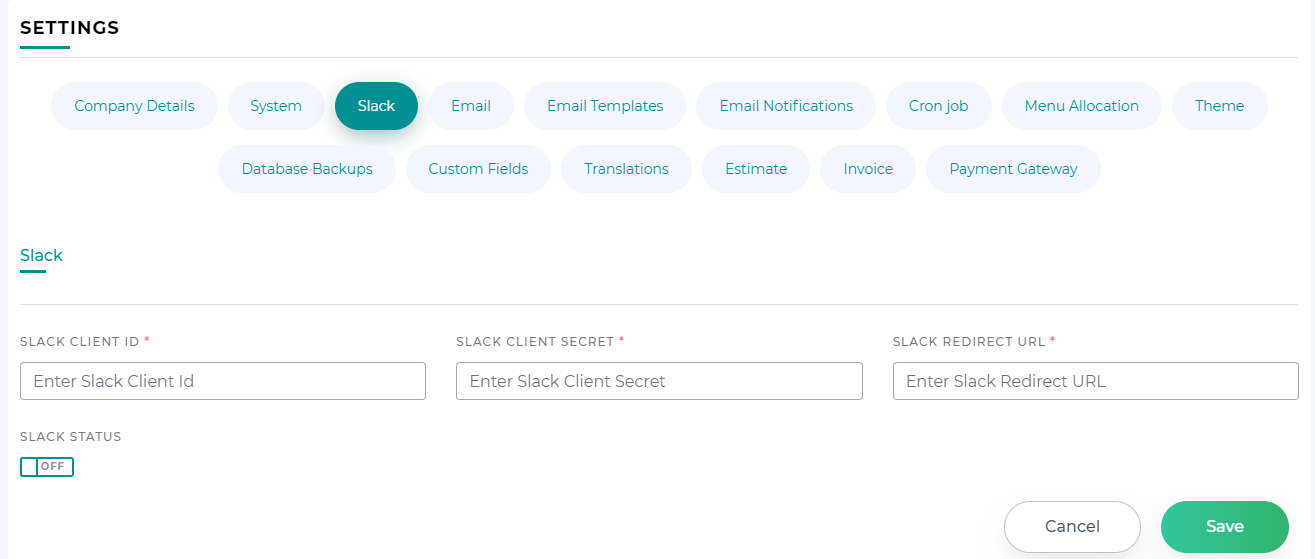
- After that Go to Manage distributions tab and Activate Public Distribution. (Optional)
-
After that Go to OAuth and
Permissions tab & add Redirect URL
- Copy Redirect URL from VipsPM.
- Don’t forget to save the URL.
-
Add Bot Token Scopes (OAuth &
Permissions -> Scopes -> User Token Scopes)
- Incoming-webhook
- chat:write
-
Add User Token Scopes (OAuth &
Permissions -> Scopes -> Bot Token Scopes)
- channels:history
- chat:write
- channels:read
- Users:read
- Install your app and Select Channel.
- Go to the application detail page where you can find your App Credentials.
- Now From VIpsPM Tool Click on Add to slack button.
- you will be redirected to the slack permission page.
- Here add your channel in which you want to get slack notification. (Step 9)
- Go to your Slack Channel and type the following as a message. (Optional Step)
- https://example.slack.com/ssb/redirect
/invite @BOT_NAME- Exa.
/invite @VipsPM SAAS
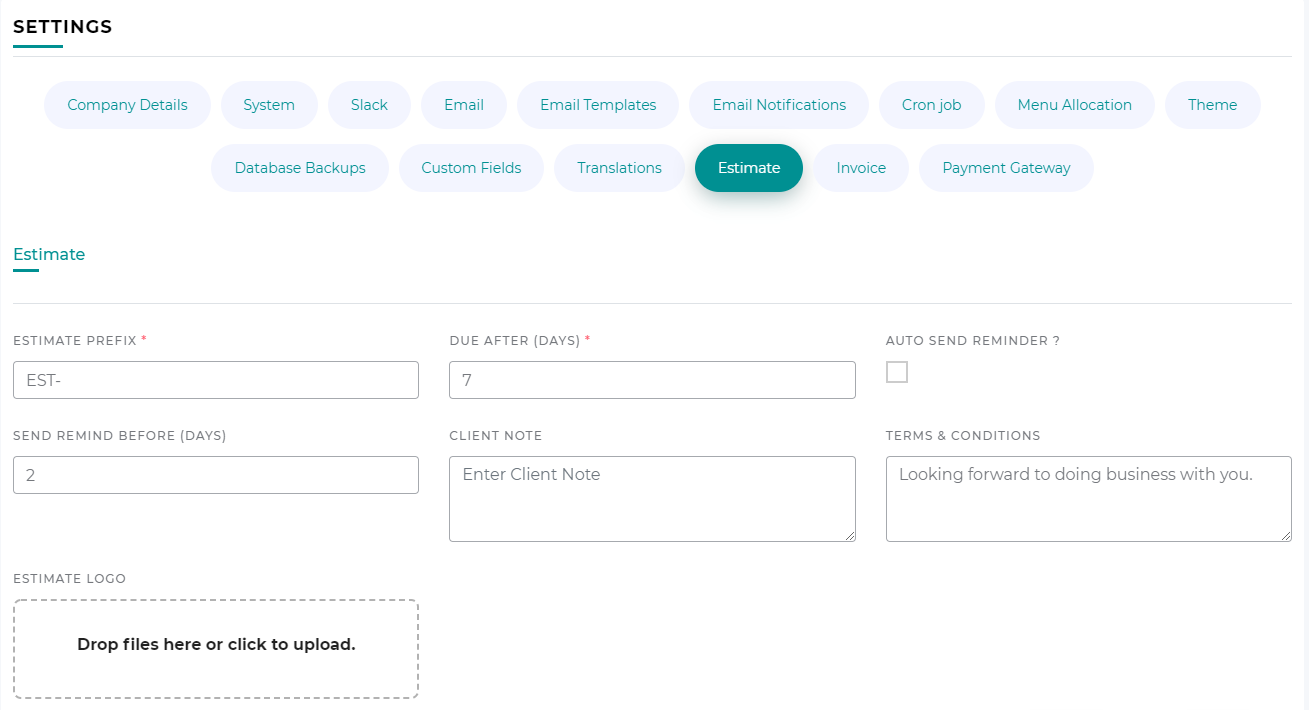
Estimate
- Add ESTIMATE PREFIX like "EST-" as you like
- Set default due to all Estimate in days
- Enable/Disable Auto Remider for estimate due and set remind day before due
- Write notes and tems and condition
- Can upload Logo in estimate from this setting
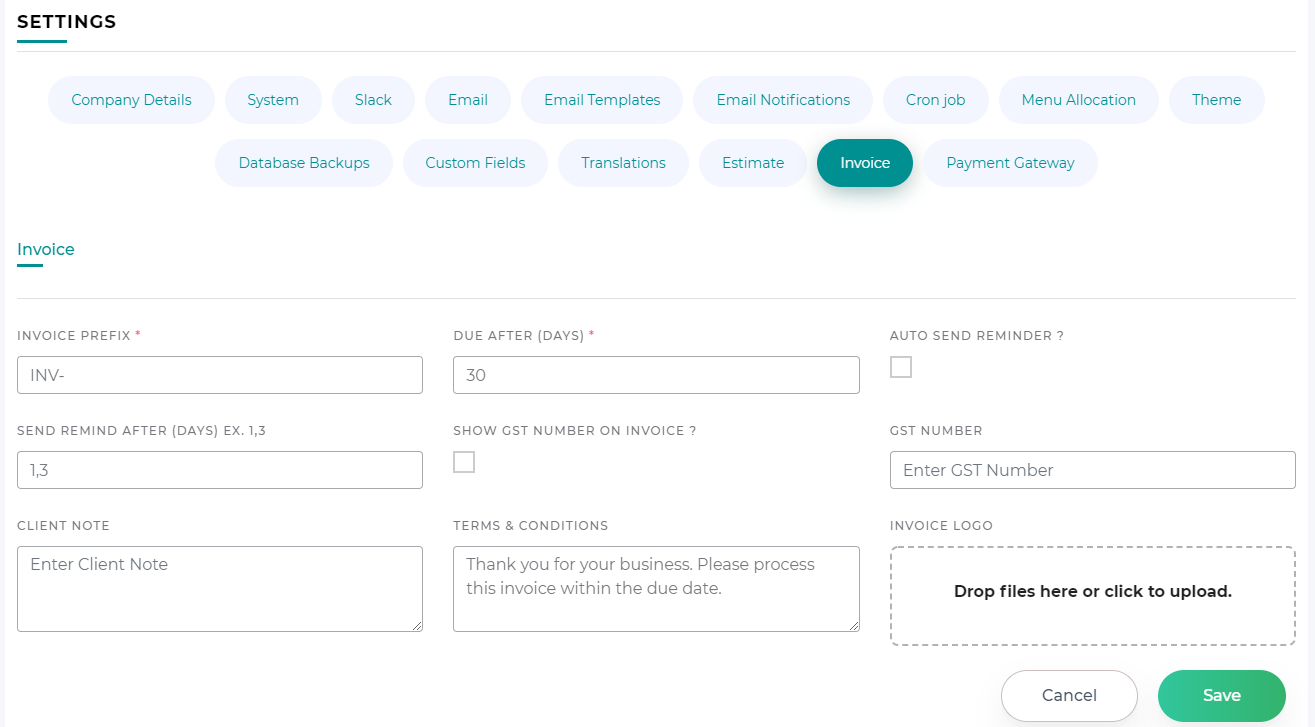
Invoice
- Add Invoice PREFIX like "INV-" as you like
- Set default due to all Invoice in days
- Enable/Disable Auto Remider for invoice due and set remind day before due
- Write notes and tems and condition
- Can upload Logo in invoice from this setting
- Enable GST if dealing with indian company
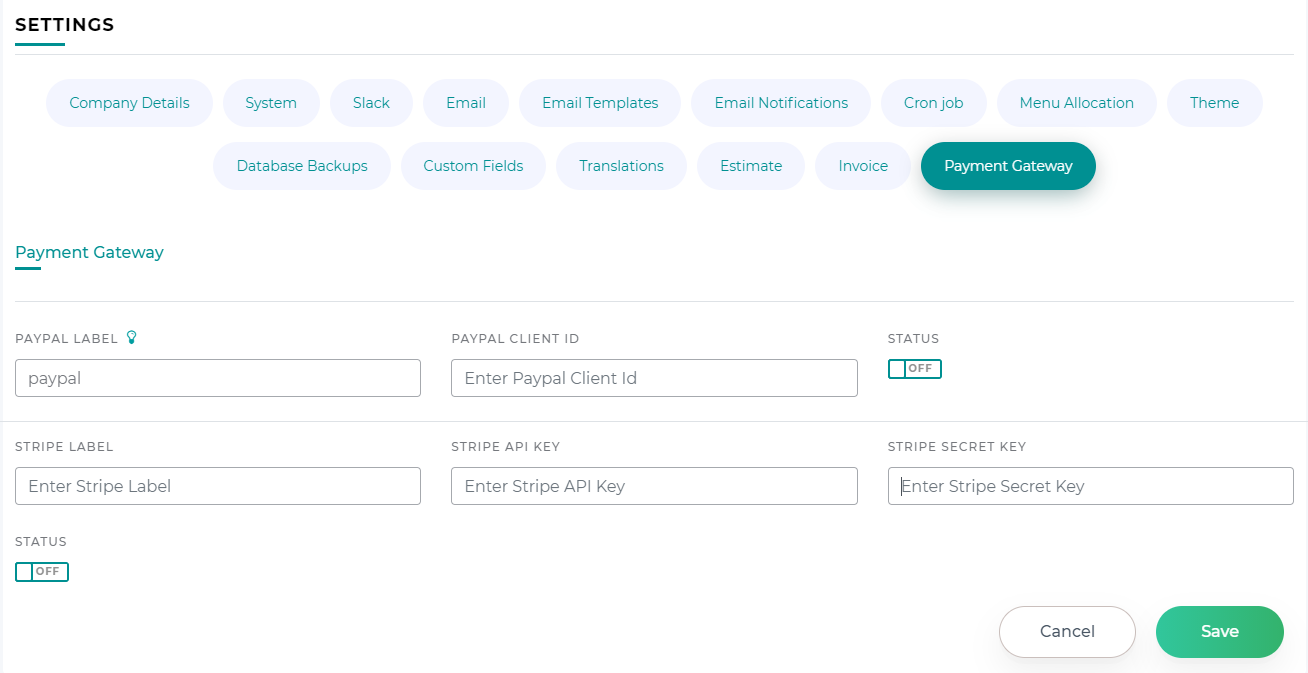
Payment Gateway
- Login to Paypal and fill Paypal Partnership form.
- Create Client ID and sandbox
- Step are mentioned here - https://developer.paypal.com/docs/business/checkout/set-up-standard-payments/
- Write Label whichever you want like "Paypal" and add clientid
- You can enable or disable paypal payment gateway
- Signup with Stripe and complete account
- create stripe API. steps are in this link - https://stripe.com/docs/keys
- Write Label whichever you want like "Stripe" and add Stripe API and Secret
- You can enable or disable Stripe payment gateway
10 Source Code Structure
- Build up on Frontend Angular 8 and Backend Laravel 11.*.
- For more info on angular, go to : https://angular.io
- For more info on laravel, go to : https://laravel.com/docs/11.x
11 Customer Support
ChetsApp always ready to serve its valued customers For any kind of sales support.
Contact us via codecanyon product support.
12 Sources and Credits
- Bootstrap
- jQuery
- Angular
- Laravel
- ngx-bootstrap
- ng-select
- chartist
- angular-calendar
- angular-checklist
- angular-tree-component
- angular/material
- chart.js
- countup.js-angular2
- dropzone
- font-awesome
- icheck
- jquery-slimscroll
- jquery-ui
- jstree
- jszip
- lodash
- moment
- nestable
- ng-pick-datetime
- ng2-charts
- ng2-file-upload
- ng2-tree
- ngx-bootstrap
- ngx-color-picker
- ngx-editor
- ngx-export-as
- ngx-filesaver
- ngx-order-pipe
- ngx-perfect-scrollbar
- ngx-permissions
- ng5-slider
- ngx-select2
- ngx-toastr
- ngx-ui-loader
- ngx-ui-switch
- ngx-translate
- pace-js
- pdfmake
- screenfull
- select2
- sweetalert2
- feather
- montserrat
- simple-line-icons
- pexels
- nicolaslopezj/searchable
- nwidart/laravel-modules
- spatie/laravel-responsecache
- tymon/jwt-auth
13 Notes
If there are any issues related to database or sql connection then Check your environment settings like database name, tables prefix, host, port, etc.
If there any change in .env file then run php artisan config:cache
If issues related to storage, then set full permission to the storage folder.
If you face issues related to bootstrap/cache then set full permission to bootstrap/cache folder.
Also, you have to check that public/uploads folder have fully rights or not.
If you want solution regarding installation or any query then contact us via codecanyon product support